How to Automate LinkedIn InMail: A 4-Feature Workflow for Full Campaign Coverage
Most outreach campaigns have a blind spot. You build a targeted list, write solid copy, launch the sequence. Then a portion of your leads never receive a single message.
The reason is profile access. Second and third-degree connections with closed profiles can’t receive regular LinkedIn messages or connection requests. Your campaign skips them silently. No error. No notification. The lead just sits there, untouched.
This guide shows you how to eliminate that gap using four Expandi features that work together: Signals (intent detection), Paid InMail automation, AI Hyper personalized messages, and Global Inbox.
Instead of walking through each feature separately, we’ll show how the full workflow applies to four real use cases. Pick the one closest to your situation.
How the four pieces connect
Before diving into use cases, here’s the logic of the workflow in one pass.
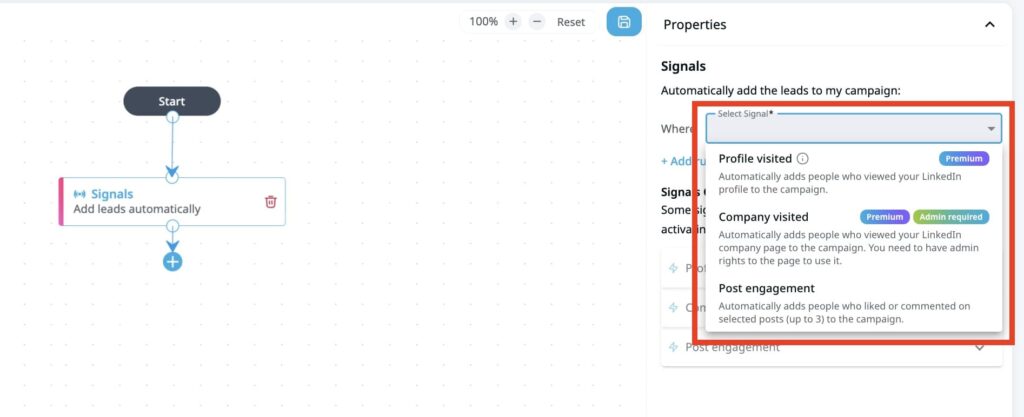
1. Signals detects real-time LinkedIn activity from your leads: profile visits, post engagement, or company page visits. When a signal fires, the lead enters your campaign automatically. You’re reaching people at the moment they’re already paying attention, not at an arbitrary time.
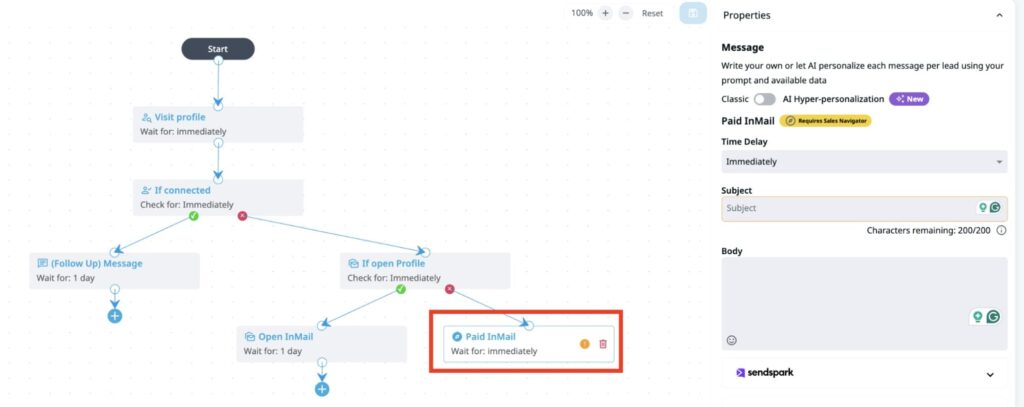
2. Paid InMail automation handles profile routing. When a campaign processes a lead, Expandi checks their profile type. Open profiles get a free InMail (no credits spent). Closed profiles get a paid InMail using your Sales Navigator credits. Connected leads get a regular message. You don’t sort your list. The system routes per lead, at send time.
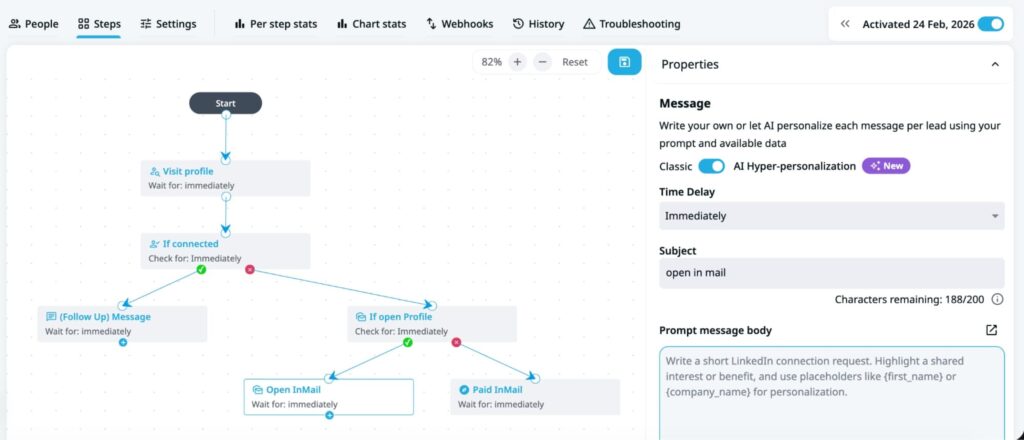
3. AI Hyper personalized messages generate a unique message for each lead. Instead of writing a static template, you write a prompt describing the kind of message you want. The AI uses the lead’s profile data, company info, and the signal that triggered their entry to create a structurally different message for each person. Not variable swaps. A different message.
4. Global Inbox syncs replies from both your regular LinkedIn inbox and your Sales Navigator inbox into one view. Every conversation is sorted by recency, tagged with its source (“LinkedIn” or “Paid InMail”), and visible across all your connected accounts. When a lead replies from either inbox, the campaign pauses automatically.
That’s the mechanism. Now, here’s what it looks like in practice.
Use Case 1: Lead Generation Agency Running Client Campaigns
Who this is for: Agency owners and outreach teams managing campaigns across multiple client accounts.
The situation
You’re running outreach for a B2B SaaS client targeting VP-level buyers at mid-market companies. You pull a list of 500 leads from Sales Navigator. After the campaign runs for a week, you notice only 340 leads received a message. The other 160 have closed profiles. Your client is paying for outreach to 500 people, and a third of them were never contacted.
You could tell your client to manually send InMails from Sales Navigator, but that defeats the purpose of hiring an agency. You need this to work automatically, across all client accounts, without adding manual steps.
The workflow
Signal trigger: Set up a Builder Campaign triggered by profile visits to the client’s LinkedIn page. When a prospect visits the client’s profile, they enter the campaign. For leads already on the list, use a standard list-based campaign with a Paid InMail node.
Campaign sequence:
- Step 1: Paid InMail node. The full 500-lead list runs through a single Paid InMail node. Open profiles get a free InMail, closed profiles get a paid InMail from the client’s Sales Navigator credits, and connected leads get a regular message. No manual sorting.
- Step 2: Wait 4 days. Give the first message time to land and be read.
- Step 3: Follow-up message. For leads who didn’t reply, send a short follow-up. This runs as a regular LinkedIn message for connected and open-profile leads; closed profiles who received a paid InMail will see the follow-up in the same InMail thread.
Message strategy: Toggle AI Hyper personalized messages on the Paid InMail node. Write a prompt that references the lead’s industry, current role, and (if available) the signal that triggered their entry. Example prompt direction:
“Write a short, direct message to a {job_title} at {company_name} in the {industry} space. Reference that they recently engaged with our content. Mention how [client product] helps teams in their industry reduce [specific pain point]. Keep it under 80 words. Professional but not stiff.”
Credit management: Set a per-campaign credit cap. If the client has 50 InMail credits per month and you’re running two campaigns, cap each at 20. This prevents one campaign from burning through the entire allocation. Free InMails always go out first, so paid credits are only consumed on closed profiles.
Reply management: Open Global Inbox. All replies from this client’s account (both LinkedIn messages and paid InMail replies from Sales Navigator) appear in one sorted view. You don’t need to log into Sales Navigator separately to check for responses. When you manage 10+ client accounts, this is the difference between catching a warm reply in 2 hours versus 2 days.
What changes for the agency
- Coverage goes from 68% to 100%. Every lead on the client’s list gets a message.
- Reporting improves. You can show the client that all 500 leads were contacted, not just the ones with open profiles.
- Reply handling scales. Instead of checking two inboxes per client account, your team works from one view per account (or one view across all accounts).
- Credit waste drops. Per-campaign caps and automatic hold logic (when credits run out, leads pause instead of failing) means no manual credit monitoring.
Use Case 2: SDR Promoting a Lead Magnet to Build Pipeline
Who this is for: Sales development reps using LinkedIn content to attract and convert prospects.
The situation
Your company published a benchmark report on outreach performance in your industry. You posted it on LinkedIn, and the post is getting traction: likes, comments, shares. Each person engaging with that post is signaling interest in exactly the problem your product solves.
You want to follow up with every person who engaged with that post. But some of them aren’t connected to you. Some have closed profiles. Manually sending InMails to each one isn’t realistic when you have 15 meetings to book this month.
The workflow
Signal trigger: Create a Builder Campaign triggered by post engagement. When someone likes, comments on, or shares your lead magnet post, they enter the campaign automatically. No manual list building. No CSV imports. The lead enters the moment they engage.
Campaign sequence:
- Step 1: Connection request (for leads you’re not connected to). If the lead has an open profile, this goes through as a free InMail instead.
- Step 2: Wait 3 days. Give the connection request time to be accepted.
- Step 3: Paid InMail node. For leads who didn’t accept the connection request and have closed profiles, this sends a paid InMail. For leads who accepted, this step is skipped and a regular follow-up message goes out instead.
Message strategy: Toggle AI Hyper personalized messages on both the connection request and the Paid InMail node. For the InMail, write a prompt that references the specific content they engaged with:
“Write a concise message to {first_name}, a {job_title} at {company_name}. They recently engaged with our post about [topic of lead magnet]. Offer them the full report and suggest a 15-minute conversation about how their team compares to the benchmarks. Don’t pitch the product directly. Keep it under 70 words.”
The AI generates a different message for each lead, referencing their actual role, company, and the signal context. A VP of Sales at a 200-person SaaS company gets a different message than a Head of Growth at a recruiting agency.
Reply management: Replies from connection requests land in your regular LinkedIn inbox. Replies from paid InMails land in Sales Navigator. Global Inbox shows both in one view, sorted by recency. When a lead replies, the campaign pauses automatically for that lead. No duplicate follow-ups.
What changes for the SDR
- Lead magnet distribution becomes automated. Instead of manually DMing everyone who engaged with your post, the campaign handles it.
- Closed profiles aren’t lost. The people most likely to be senior (VPs, C-suite) are also the most likely to have closed profiles. Paid InMail reaches them.
- Follow-up timing is signal-driven. The lead engaged with your content today. The message arrives within hours, not next week when you get around to checking who liked your post.
- Conversation tracking is centralized. You don’t lose a warm reply because it landed in Sales Navigator instead of your LinkedIn inbox.
Use Case 3: Recruiter Sourcing Passive Candidates
Who this is for: Recruiters and talent acquisition teams reaching candidates who aren’t actively looking.
The situation
You’re filling a Senior Engineering role. Your hiring manager needs 10 qualified candidates submitted within two weeks. You pull a list of 150 potential candidates from Sales Navigator. Most are passive, meaning they’re employed, not actively job-seeking, and unlikely to accept a connection request from a recruiter they don’t know.
Here’s the friction: 60-70% of senior engineers have closed LinkedIn profiles. Connection requests sit unaccepted. Free InMails aren’t available. Your only option is paid InMail, but sending 100+ individually from Sales Navigator takes hours, and you lose track of who replied where.
The workflow
Signal trigger: Set up a Builder Campaign triggered by profile visits. Senior engineers often check who viewed their profile. If one of your target candidates visits your LinkedIn profile after seeing your activity in their network, they enter the campaign. For the remaining candidates, add them directly to the campaign via list import.
Campaign sequence:
- Step 1: Paid InMail. Lead with InMail for this audience. Connection requests from recruiters have low acceptance rates with passive senior candidates. Paid InMail reaches them directly, regardless of profile type.
- Step 2: Wait 5 days. Passive candidates take longer to respond.
- Step 3: Connection request. For candidates who didn’t reply to the InMail, send a connection request with a note. This creates a second touchpoint through a different channel.
Message strategy: Recruiting outreach lives or dies on personalization. Candidates receive dozens of generic recruiting messages per week. Toggle AI Hyper personalized messages on the Paid InMail node:
“Write a message to {first_name}, a {job_title} at {company_name}. Reference their experience with {skills or technologies from profile}. Mention the role is at a [stage] company working on [specific technical challenge]. Don’t list requirements. Ask if they’d be open to a 10-minute conversation about the project. Keep it under 90 words. Conversational tone.”
Each candidate gets a message that references their specific background, not a mail-merge with their name swapped in. A backend engineer with Kubernetes experience gets a different message than one with ML pipeline experience, even though both are candidates for the same role.
Reply management: Candidates reply through different channels. Some respond to the InMail (lands in Sales Navigator inbox). Some accept the connection request and reply via regular LinkedIn messaging. Some do both. Global Inbox consolidates all responses into one view, tagged by source. You see every candidate interaction in one place, sorted by most recent.
What changes for the recruiter
- Reach rate goes from roughly 30% to nearly 100%. Closed profiles no longer mean unreachable candidates.
- Personalization scales. Instead of choosing between “send 100 generic InMails” or “write 20 great ones,” you get AI-quality personalization across the full list.
- Credit efficiency improves. Free InMails go out first. Paid credits are only used on candidates who genuinely require them.
- Response tracking is consolidated. No more switching between LinkedIn messaging and Sales Navigator inbox to check who replied. One view, all conversations.
Use Case 4: Founder Building Pipeline With Minimal Time
Who this is for: Founders and solo operators doing their own outbound with limited hours per week.
The situation
You’re a seed-stage founder. You don’t have a sales team. You spend maybe 5 hours per week on outreach, and most of that goes to responding to replies and taking calls. You need your campaigns to run without daily intervention.
You’ve been running a basic connection request campaign, but your acceptance rate is around 25%. That means 75% of your list never hears from you. You have a Sales Navigator subscription (you use it for lead search), which comes with 50 InMail credits per month that you’ve never used through Expandi.
The workflow
Signal trigger: Set up a campaign triggered by all three signal types: profile visits, post engagement, and company page visits. As a founder, you’re probably active on LinkedIn (posting about your product, engaging in your industry). When someone from your target audience interacts with your content or checks out your profile, they enter the campaign. This replaces manual list-building with automated intent capture.
Campaign sequence:
- Step 1: Connection request. Start with a connection request. It costs nothing and, if accepted, opens a direct messaging channel.
- Step 2: Wait 5 days.
- Step 3: Paid InMail. For leads who didn’t accept the connection request, send a paid InMail. This catches the 75% who would otherwise fall out of your funnel.
Message strategy: You don’t have a copywriter. You don’t have time to write 50 custom messages. Toggle AI Hyper personalized messages on both steps:
For the connection request note:
“Write a brief, casual connection request to {first_name} who is a {job_title} at {company_name}. Mention a shared interest in [your industry/problem space]. Don’t pitch anything. Just express genuine interest in connecting. Under 40 words.”
For the Paid InMail:
“Write a direct message to {first_name}. They’re a {job_title} at a {company_size} company. Reference that they recently {signal: visited profile / engaged with post / visited company page}. Briefly explain what [your product] does in one sentence. Ask if they’d be open to a 15-minute conversation. No pressure. Under 80 words.”
Reply management: You check Global Inbox once in the morning. All replies from all channels are sorted by recency. You see a message preview without opening each conversation. You respond to the warm ones, ignore the “not interested” ones, and move on. Total time: 15 minutes.
What changes for the founder
- Outreach runs passively. You set it up once. Leads enter based on their behavior. Messages go out automatically. You only intervene when someone replies.
- Your 50 InMail credits are no longer wasted. They’ve been sitting unused in your Sales Navigator account. Now they reach the leads your connection requests missed.
- You don’t need to write messages. The AI handles personalization. You write one prompt, the system generates a unique message per lead.
- 5 hours per week stays at 5 hours per week. The added reach and personalization don’t require more time. They require a better campaign setup, which you do once.
Setting up the full workflow: quick reference
Regardless of which use case matches yours, the setup follows the same steps:
1. Configure your signal triggers
In the campaign builder, create a Builder Campaign. Set the entry condition to one or more signals: profile visits, post engagement, or company page visits. Choose a lookback window (how recent the signal should be). For time-sensitive outreach like lead magnet promotion, keep it short (24-48 hours). For passive candidate sourcing or founder outbound, a wider window (7 days) works.
2. Build your sequence with a Paid InMail node
Add your campaign steps. Where you want to reach closed profiles, add a Paid InMail node. The system handles routing automatically: open profiles get free InMails, closed profiles get paid InMails, connected leads get regular messages.
Set your per-campaign credit cap. If you have 50 monthly credits and multiple campaigns running, divide your budget. Free InMails always go out first, so your paid credits are only used where they’re needed.
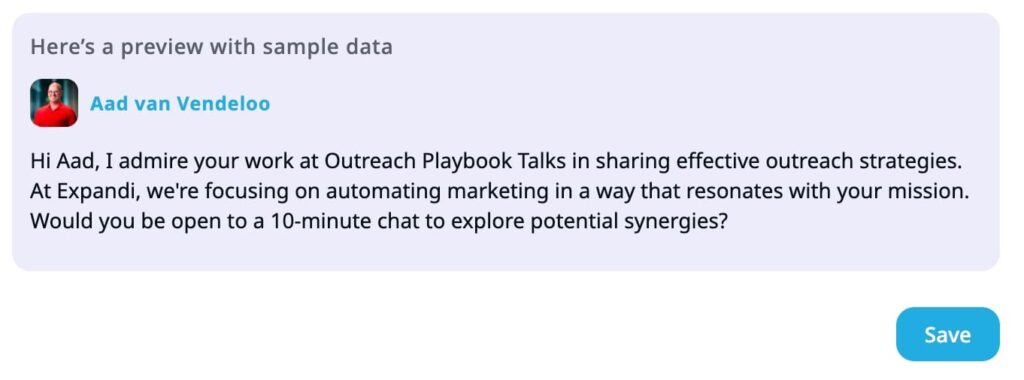
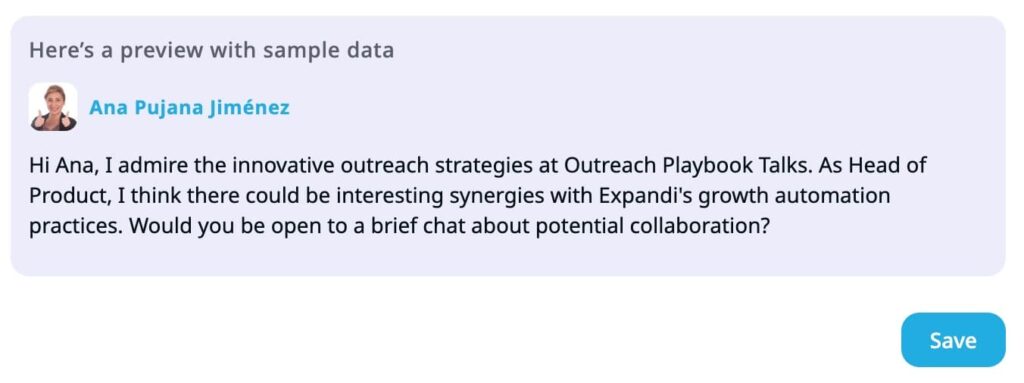
3. Enable AI Hyper personalized messages
On your messaging nodes, toggle to AI mode. Write a prompt that describes the message you want. Include placeholders for lead data ({first_name}, {job_title}, {company_name}) and reference the signal context where relevant.
Test your prompt using the “Test sample message” function. Generate a few variations and adjust until the output matches your voice and intent.
4. Monitor from Global Inbox
Open Global Inbox to see all replies across LinkedIn and Sales Navigator, across all connected accounts, in one sorted view. Replies trigger automatic campaign pauses. No duplicate follow-ups. No missed responses.
Common mistakes to avoid
Running Paid InMail without credit caps. One aggressive campaign can burn through your entire monthly allocation in days. Always set per-campaign limits.
Writing vague AI prompts. “Write a good message to this lead” produces generic output. Be specific about tone, length, what to reference, and what to ask for. The more precise your prompt, the better the message.
Using all three signal types for a narrow audience. If you’re targeting a small list of 50 high-value accounts, a single profile visit signal might fire only a few times per month. Broaden your signals or supplement with a list-based campaign.
Ignoring the Sales Navigator inbox. Even with Global Inbox, some teams default to checking only their regular LinkedIn inbox. Make Global Inbox the starting point for your reply workflow, not an afterthought.
Setting follow-up timing too tight after InMail. Paid InMail replies tend to come faster than connection request replies (the message lands directly, no acceptance required). But “faster” still means 2-5 days for many recipients. Don’t send a follow-up 24 hours after an InMail.
Get started
All four features are available in Expandi today. If you already have a Sales Navigator subscription connected to your account, you can add a Paid InMail node to any campaign right now.
New to Expandi? Start a 7-day free trial and build your first campaign using the workflow above. No credit card required.
You’ve made it all the way down here, take the final step