10+ Features for Smart LinkedIn Inbox Management – Expandi
Let’s be honest – one of the most important parts of LinkedIn is the inbox section.
That’s where it all happens:
The outreach, the pitching, setting up a demo/meeting with your leads, and so on.
And if LinkedIn is one of your primary channels that you use daily, your inbox is probably so full you could get lost in it.
Yet, customer engagement is important as ever.
If you’re trying to manage your personal page (and company page!) engagement from the platform’s inbox – you might find yourself overwhelmed. What managing your LinkedIn inbox might look like when you’re unorganized.
Fear not though, there’s a better way.
Ready to take control back of your inbox?
Great, here’s what we’re going to cover:
- The Problem With the Current LinkedIn Inbox System
- 5 Ways to Simplify and Clean Up Your LinkedIn Inbox
- Guide to a Smart LinkedIn Inbox – 6 Advanced Features That Boost Customer Engagement and Save Time
So, here’s how to start generating 10x more leads with the safest LinkedIn tool on the market and improve your customer engagement while doing so –
The Problem With the Current LinkedIn Inbox System
So, first, what’s wrong with the current LinkedIn inbox, anyway?
Well, here’s the thing:
If you only have less than 500 connections and don’t post on LinkedIn a lot – there’s nothing inherently wrong with the system.
This probably means you’re not sending out a lot of messages or doing outreach, so, things should be easy to organize and keep track of.
But if you’re active on LinkedIn and it’s an important customer engagement channel for your business – staying on top of everything can become time-consuming.
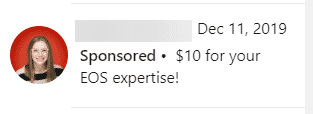
Sometimes, LinkedIn also pushes job alerts, news digests, InMails, and even sponsored posts straight into your inbox.
So, if there’s a specific message you want to reply to, you’d have to do a whole lot of scrolling to find it – especially if you receive a lot of connection requests daily like me.
The more active you are – the more flooded your inbox becomes.
This problem only becomes much worse if you manage multiple LinkedIn accounts.
In short: after a certain point, staying on top of your LinkedIn inbox becomes too much work.
What’s the solution?
Here’s a bunch of ways you can regain control of your inbox and manage all of your LinkedIn messages:
5 Ways to Simplify and Clean Up Your LinkedIn Inbox
Overwhelmed by LinkedIn mail? Missing timely updates and messages from prospects? Have to scour through your inbox to find the message you were looking for?
Here’s how to fix your LinkedIn inbox :
1. Know the Basics
Not sure where to begin?
Here’s what you can do while navigating through your inbox:
-
- Using the filters: By default, when you’re looking at your inbox, you see all messages. But if you click the drop-down arrow next toe the ‘All Messages‘ heading, you can pick a specific category for the messages. Such as: All Messages, Archived, My Connections, Unread, InMail, Spam.

-
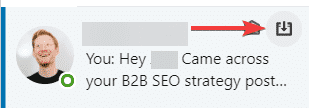
- Archiving: After you read your message, you can archive it for later viewing. But unlike other email systems, you can’t create your own folders in your inbox. Instead, you can simply archive a message into a general archive on LinkedIn. To view your archived messages, click the Archived link on the left side of your screen when looking at your inbox.
Once archived, you can use the ‘Archived’ filter (see above) to find all the archived messages.
-
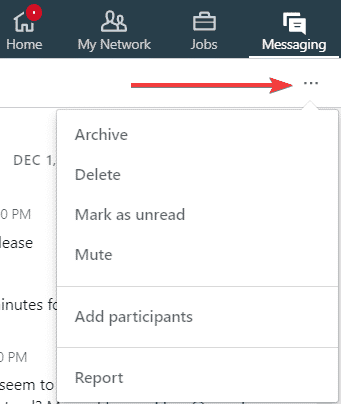
- Others: Finally, you can also click the drop-down dots above the conversation to either delete, mark as unread, mute, add participants (to make a group chat), or report the message.
2. Reach Inbox Zero
Inbox zero is an email management philosophy aimed at keeping the inbox empty – or almost empty, at all times.
Why would you want to get your inbox down to zero?
Look at it this way:
Your inbox messages are tasks that need to be completed.
They will need a reply, a follow-up, or something else, depending on the person.
And having a giant list of pending messages all the time isn’t an effective method of organization.
You’ll start to lose track of messages and soon become visually overwhelmed.
To fix that, you can either:
-
- Archive a message if it requires no action on your behalf.
-
- Reply right then and there, if you can in 2-3 minutes or less. Then, archive it immediately.
-
- Set it as unread if the message requires some level of through or response to write out. This way, you can get back to it later (same day, or next week), and quickly see the full list of messages that require a reply.

You after getting your inbox down to a 0.
Not all messages are equally important and your time is precious.
So, the next time you check back on your LinkedIn inbox, you’ll only see important messages that need your attention.
Read more about the inbox zero philosophy and strategies (also applies to email inbox) here: 4 Unique Strategies for Reaching Inbox Zero
3. Choose the Right Email For LinkedIn Updates
Keep receiving emails from LinkedIn about how you received a new message or that someone viewed your profile?
They tend to get annoying after a while and get in the way of your workflow.
To prevent this, choose a primary address that suits the way you use LinkedIn.
For example, you can use your Gmail address as your primary address, and access LinkedIn related mail directly from your inbox.
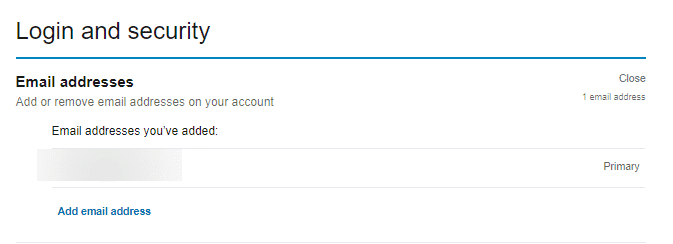
You can have more than one email address registered with your LinkedIn profiles (personal or company page).
So, you can have both your personal and company email tied to your LinkedIn, and people can find you using either.
This way, you can also use your personal email to maintain your LinkedIn profile when you change jobs, and lose your old company email address.
You can add or change your email address through ‘Settings‘, ‘Account‘ and under ‘Login and Security‘
4. Manage Your Group Message Updates
If you’re in a few LinkedIn groups, they can flood your inbox real quick.
The number of LinkedIn groups you join and are active in can profoundly affect how many emails you receive from LinkedIn.
If you prefer individual emails from specific groups, or if you’d rather opt out of receiving emails from LinkedIn groups you’re in entirely, visit and update your setting preferences accordingly.
You can find this option by clicking ‘Settings & Privacy‘ section under your profile, ‘Communications‘, and then, ‘Set the frequency of emails‘ (for Group digests). From there, a list of all the groups you’re in will load, and you can update your preferences from there.
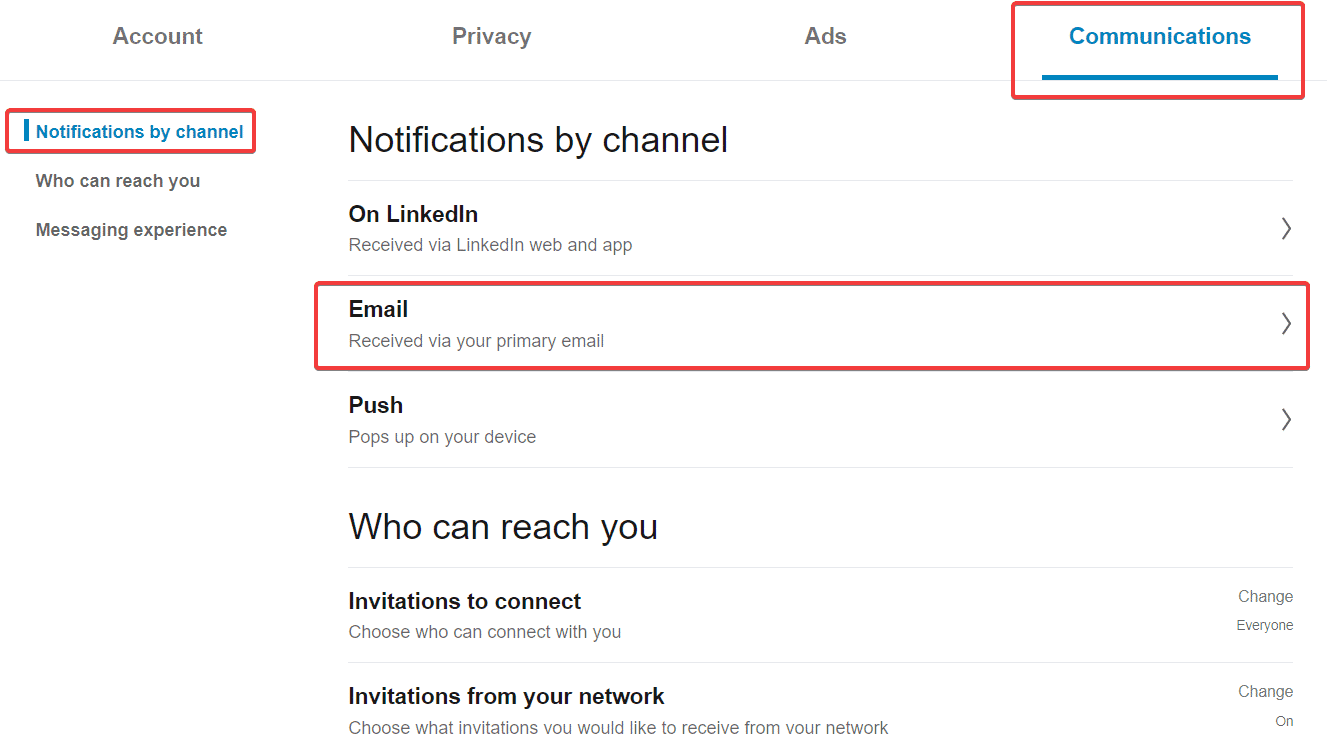
You can also change who can reach you (invitations to connect/from network), and your messaging experience below.
5. Use Zapier Integrations
Zapier is an online automation tool that lets you connect your favorite apps (e.g. Gmail, Slack, Mailchimp, etc.) to automate repetitive tasks, and connect your workflow.
It’s super easy to set up and you don’t even need any coding knowledge.
For example, let’s say you get a lot of daily attachments in your Gmail accounts and you want to save them to Dropbox.
Every time you get an attachment, you’d have to open the email, click the attachment, and then save to Dropbox.
Or, you could just let Zapier automate the whole thing for you and save time.
Through Zapier, you can connect LinkedIn up to up to 1,500+ apps.
Learn more about potential LinkedIn and Zapier connections here: LinkedIn Integrations, Connect Your Apps With Zapier.
And learn how to use Zapier to connect your CRM and boost your overall marketing efforts (among other ways to optimize your LinkedIn campaigns here): 5 Essential Steps to Prepare Before Launching an Automated LinkedIn Outreach Campaign
Now, if you do a lot of outreach to different target audiences with different approaches, it can STILL be a problem to manage your LinkedIn inbox.
While it may sound simple on paper, it just becomes too time-consuming to mark everything as archived, reply and follow up one-by-one and so on…
You can use the above tips to simplify your inbox, but there are even more convenient and advanced ways to manage your inbox.
Personally, I do A LOT of LinkedIn outreach as it’s my main lead generation platform.
I send and receive up to 100 (if not more) LinkedIn messages daily, and unfortunately, I am not the most structured person in the world.
Here’s what works for me and how I manage to save a lot of time with my LinkedIn account using Expandi.
Guide to a Smart LinkedIn Inbox – 6 Advanced Features That Boost Customer Engagement and Save Time
One of the main reasons I use Expandi is because of the way I get to manage my inbox (especially useful when using LinkedIn message automation).
Here’s how I never miss a LinkedIn message and the exact filters I use:
1. Managing your LinkedIn Inbox From One Place
When using LinkedIn some messages tend to slip away and things can be easy to lose track of.
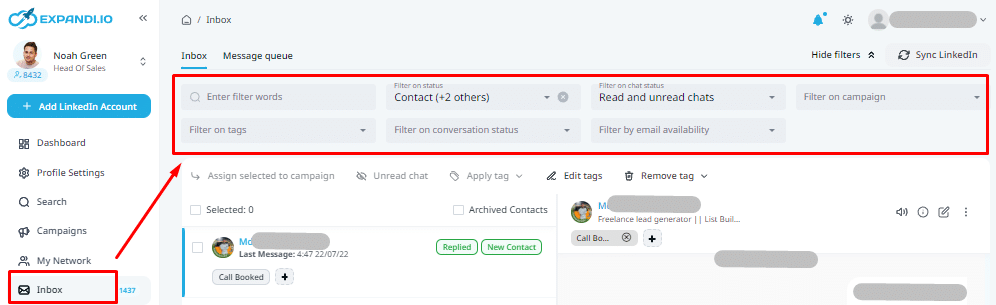
To make sure I never lose an important incoming message, I set filters couple of times per day on Expandi to see who replied, unread chats, and more.

The smart inbox allows you to see all messages without leaving the app.
Because I’d rather not go through each of my messages manually (again, I’m lazy, I know), I open up Expandi every few hours, and set the Awaiting Reply filter to see who I have to respond to.
And being able to manage my inbox from the same place I launch my outreach campaigns from (more on this below) – makes everything even more convenient for me.
For example, whenever someone wants to start an Expandi trial, this is the filter I use to see the most important conversations upfront (more on this below).
The smartness of these filters just means there’s less stuff I have to remember and do manually – so, we’re off to a great start.
2. Managing Multiple Accounts
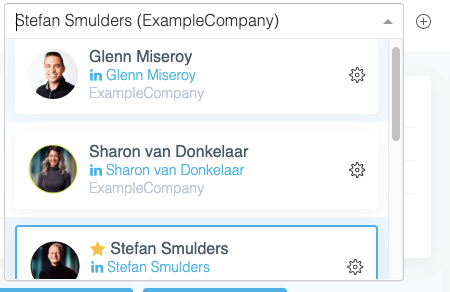
Because Expandi is designed for agencies (more on this in the next article, stay tuned ), it also allows me to manage other peoples’ profiles.
This comes in very handy when I want to share campaigns between my colleagues.
It’s very important I stay in touch and follow up with everyone interacting with Expandi, to ask for feedback or in case they need help.
So, in case I need to switch accounts and quickly help out a colleague on how to respond, I can do that in under 2 minutes using Expandi.
Please, visit our webinar for more useful information about Expandi and how does it work.
You can use Expandi just for yourself, or together with your team to manage your clients (e.g. as an agency).
Now, compare doing this to actually logging in and out of LinkedIn accounts manually.
Convenience wins again.
3. Better Campaign Insights
As mentioned above, I manage a lot of LinkedIn outreach campaigns.
Here’s the part that makes that possible and how I review each campaign once it’s done.
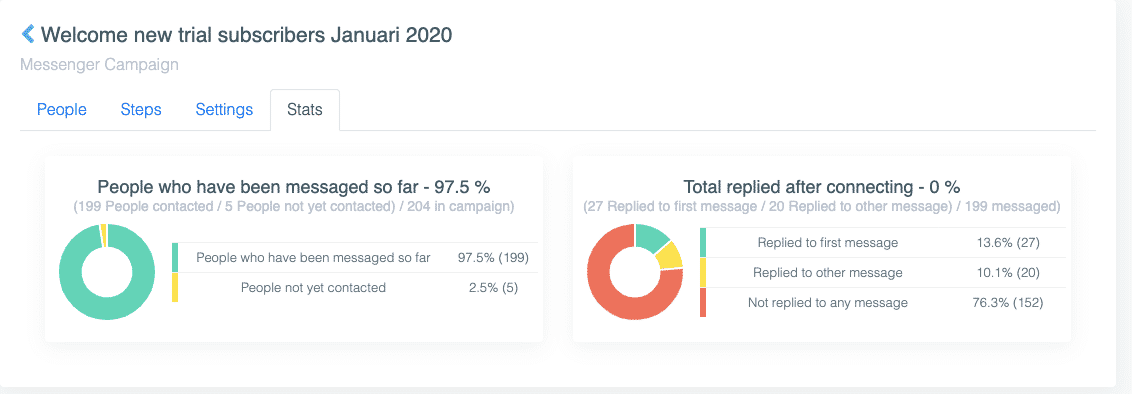
Luckily, Expandi comes with a dashboard that’s ready to track all the key insights and metrics.
The Expandi dasbhoard comes ready with all the key insights and metrics to see how well my campaigns are performing.
Because I’d rather not be manually compiling all the data (takes too long ), all I have to do is just go through the dashboard and at a glance – I already know what’s working and what’s not.
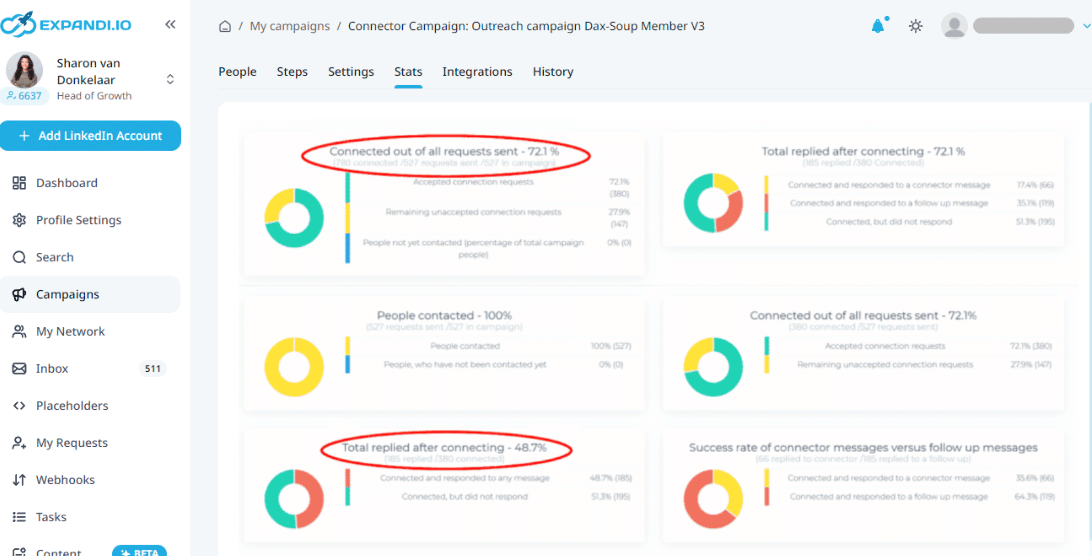
See the specifics of this outreach campaign, how I gained a 49% reply rate, and the exact templates I used here: The best Growth Hack to generate more leads on LinkedIn for 2026
This way, I can better understand the connection volume, response rates, insights, and other metrics of each campaign.
4. Notes and Other Info
Meanwhile, if I have to zoom in on a specific conversation instead of the whole campaign, I can always add custom notes and peek at their info, to make my life easier.
Manually going to LinkedIn from Expandi for each conversation would just take too long.
With notes, I can just add custom info and filters (as mentioned above).
And I also use this on a case-to-case basis for important contacts with whom I want to follow up on something specific (e.g. trial, where we met, etc.).
And with the info tab, I can always double check their contacts (see below) – which is always super convenient.
-
- LinkedIn name/Link.
-
- Email (if displayed).
-
- Phone (if given).
-
- Region/address.
-
- Company name.
-
- Job title.

Because all this amazing info is available on standby, I wanted to share the feedback and the messages I get from my contacts to my colleagues.
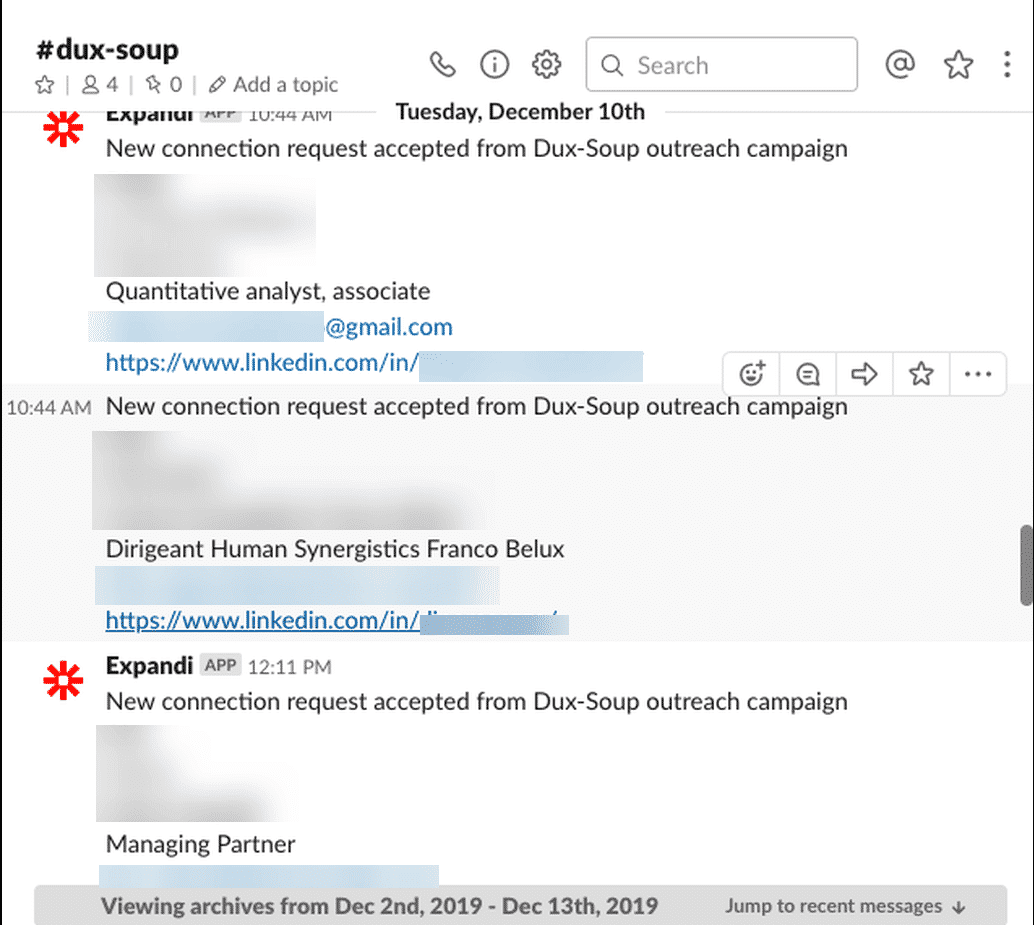
If I connected with someone important, or they signed up for a trial, that’s some good news I’d love to share with my colleagues in the Slack channel.
And the way this works is by using the Web Hook feature from Zapier.
Here’s how:
Because of the amazing trigger reply for each campaign, I can push the reply from our prospects and LinkedIn notifications directly to our Expandi slack channel.
I did something similar with the notes and filters to segment a list of prospects on LinkedIn (based on the post they engaged with) and then reach out to them with a relevant message.
Check out the full case study and the exact steps I took here: The Best LinkedIn Content Retargeting Growth Hack to Start Generating Leads For 2026
5. Custom Filtered Inbox (+ Full Workflow)
My favorite feature – custom filters.
This basically means I can set aside and segment a group of people, based on custom preferences.
Here’s what the complete workflow looks like.
For example, let’s say someone reads one of my blog posts, and reaches out to me to request a free 7 day trial.
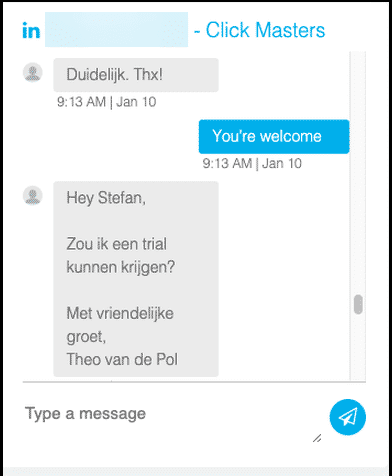
I then give them a custom 7-day Expandi trial tag
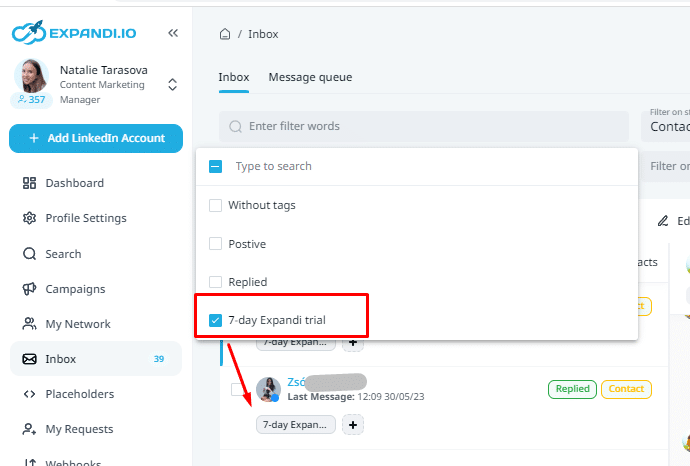
With the ‘7 Day Expandi Trial’ custom tag, I get a custom list of people I either need to follow up with or reply immediately.
With this, I can constantly get a list of important conversations I prioritize between the ton of other connections in my inbox.
After this, I select the above list and add them to messenger.
This is a drip campaign for 1st degree connections I specifically designed for people who want to start the Expandi trial.
With this, they automatically receive a follow up message to check on how they’re doing with the trial, and if they have any questions.
This helps me in 2 major ways:
-
- I don’t have to manually remember and look for people who signed up for the trial.
-
- I don’t have to message all of them the same thing (e.g. how’s the trial going), saving me a ton of time.
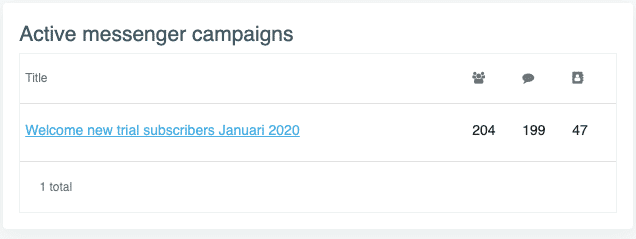
And finally, to make things even better, I also get campaign insights on the go from the dashboard:
So, to recap, here’s the complete workflow order:
-
- Someone messages me on LinkedIn that they want to try the free 7 day Expandi trial.
- I give them the appropriate tag from the app.
- This adds them to a 1st degree messenger drip campaign that sends out automated messages to check back on them.
- I then check back on the campaign insights to see how many people read me my message or replied (based on this, I can tweak and A/B test the message templates to see what copy works better. )
- (Optional): As an optional step, I have also connected Expandi to our work Slack channel, using Zapier to automatically share good news (such as who accepted my connection request on LinkedIn) to my colleagues in slack!
Learn how to connect Expandi to Slack (or your CRM) using Zapier here: 5 Essential Steps to Prepare Before Launching an Automated LinkedIn Outreach Campaign (Step 4).
This is a great example of the custom filter.
Other default filter tags include:
-
- No Interaction – Haven’t messaged them or they haven’t messaged you yet.
-
- Awaiting Reply – To see the full list of people to follow up with.
-
- Replied – Everyone who already replied.
-
- Custom Filter – In case I need to set as important LinkedIn messages for future actions or segment lists, as noted above. You can always set a custom tag (e.g. for a specific campaign or people), check back on them later and follow-up accordingly.
From there, I can retarget people with a specific tag, or reach out to them with a specific campaign/message in mind.
6. Away Messages (+ Even Better Personalization)
At last, the final feature – Away message.
Just like many email clients, LinkedIn has an Away message feature that allows you to tell other LinkedIn members that they can expect a delayed response from you to their messages.
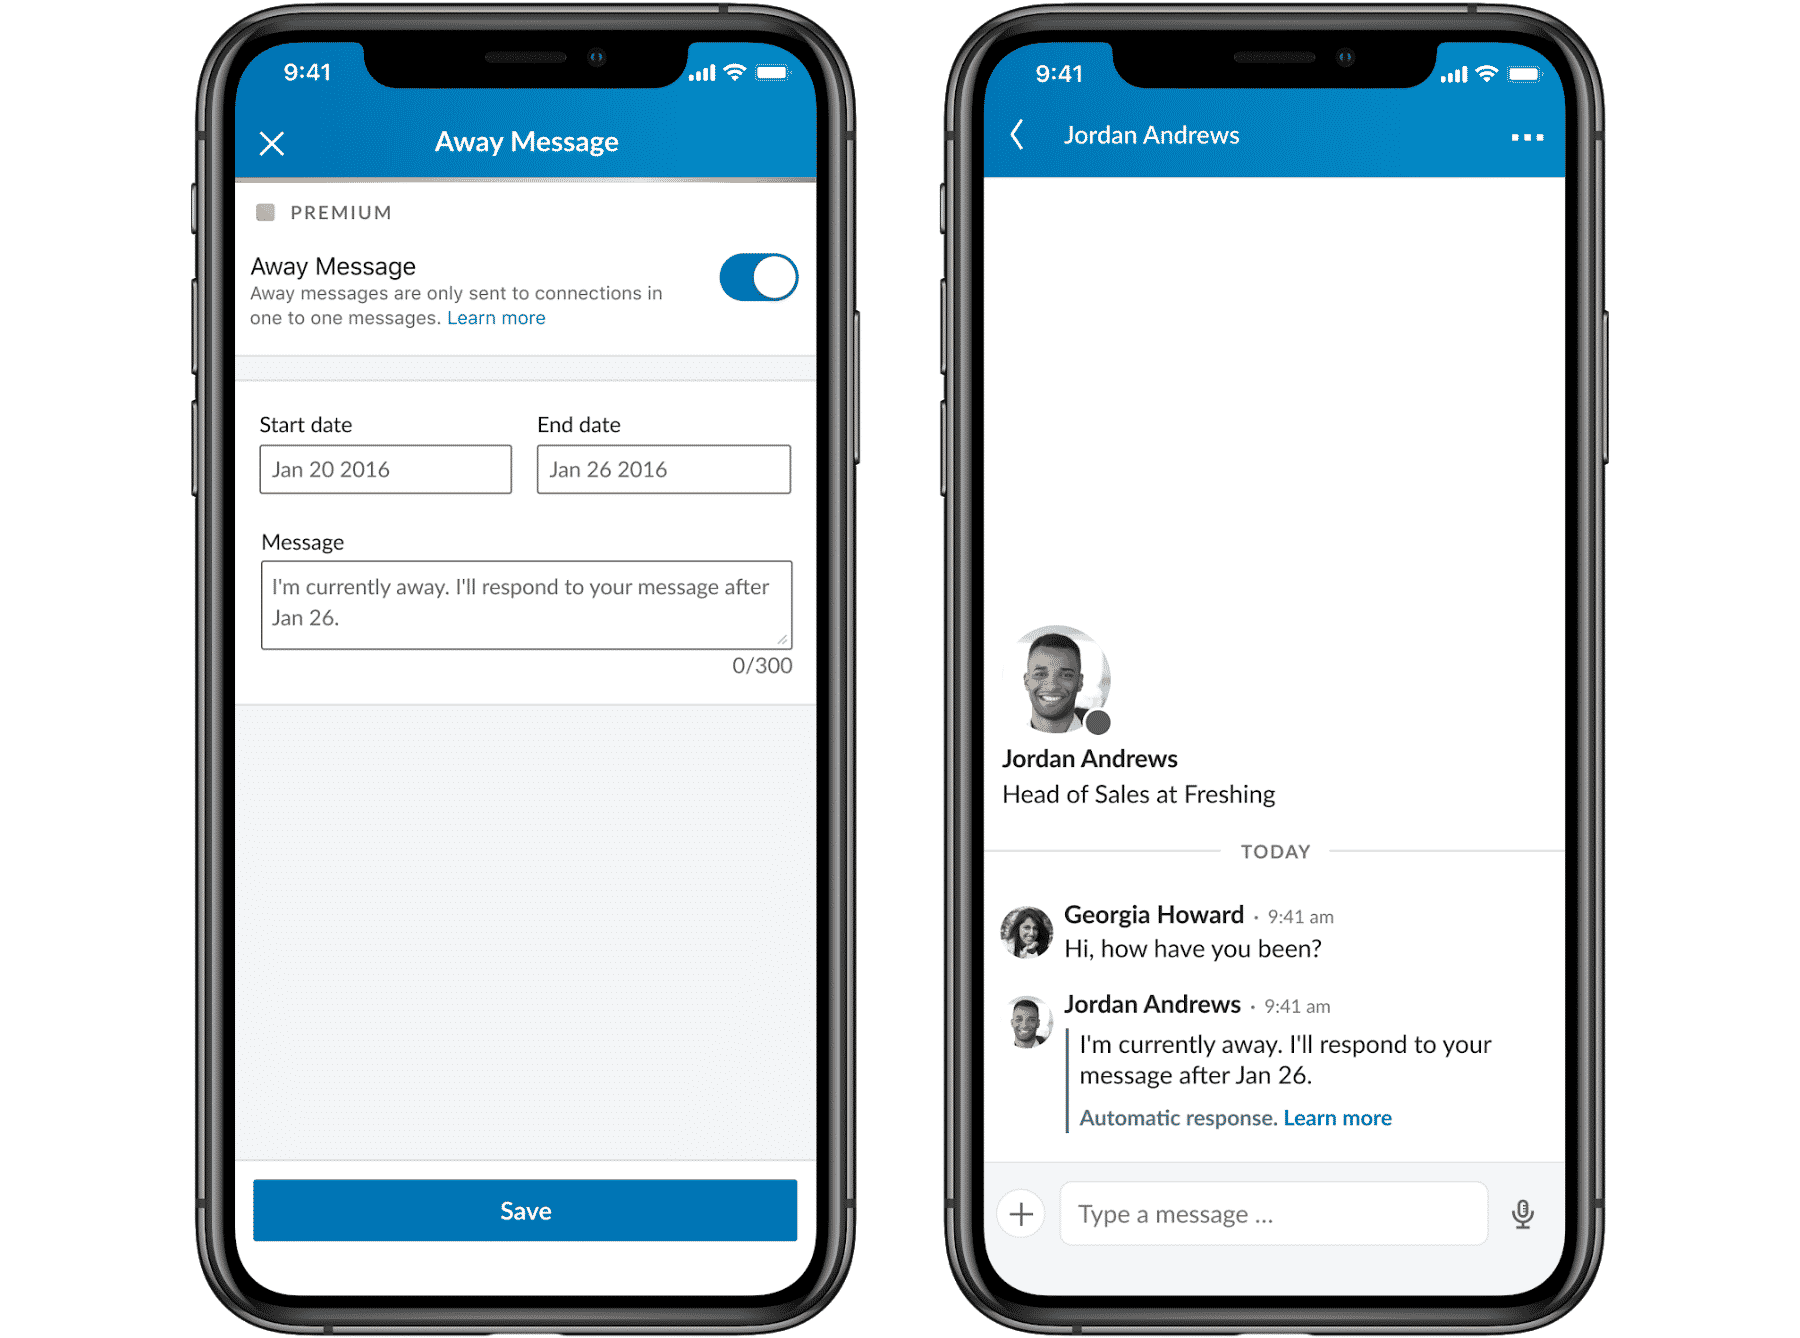
You can set it up quite easy, it only takes a few steps:
-
- Click on More at the top of your inbox.
- Choose Set away message.
- Switch the toggle to turn on the Away message feature.
- Select your Start and End dates
- Write your message.
- Click on Save.
It’s as simple as that. Bear in mind that the away messages can be set up to three months and that only your connections and your direct conversations are affected. Also, you’ll need to be a Premium LinkedIn user for this to work.
You can only have one away message which is a bummer. If you want to have more personalized messages, consider using our Hyperise integration.
Our integration allows you to do something that no one has done before – personalize your message text, images, and gifs! Expandi can use dynamic images from Hyperise and put them into your clients’ inboxes automatically. This approach can help you 2X your effectiveness.
You can even embed videos, Typeform, and more.
Learn how this can become useful and how it can help with your outreach personalization here: LinkedIn Personalization Growth Hack Beyond First Name and Last Name
Recap
So, in summary, if you plan to use LinkedIn as one of your primary marketing channels, it’s important you’re managing your inbox correctly.
Call me lazy, but I’d rather use automation as much as possible, to avoid keeping track of messages, replies, follow-ups and all that stuff manually.
And because I’d rather save my time and handle my customer engagement more efficiently, I just keep things simple and manage my whole inbox from Expandi.
For this, the following features make my life a whole lot easier:
-
- Having the whole LinkedIn inbox in one place.
- Being able to manage and switch accounts with just a click.
- Getting better campaign insights at a glance from the dashboard.
- Being able to add custom notes, and peek at prospect’s info from the app.
- Setting and organizing leads by custom filters and tags.

Wondering if Expandi is right for you?
Here’s what you can do:
-
- Send me a friend request on Facebook
- Let me know you read this article and that you’d like to give the tool a try.
- After that, I’ll grant you a FREE 7 day Expandi trial in a personal message (just ask!)
Ready to launch your first LinkedIn automated outreach campaign now that you know how to manage your inbox?
Also check out:


You’ve made it all the way down here, take the final step