How To Integrate LinkedIn With HubSpot CRM Using Zapier
Whether you’re using LinkedIn for hiring, lead generation, or simply searching for your sales prospects, using a CRM is one of the best ways to gather and track customer interactions in one centralized location.
Now, you probably already know what customer relationship management software is and what it does.
So, we’re not going to start from zero here.
Instead, if you want to manage, track, and organize your leads and LinkedIn interactions, we’ll show you how to streamline this process by connecting LinkedIn to your CRM, using Zapier.
For this guide, you’ll need:
- CRM of your choice. We’ll use HubSpot as an example since that’s what we use.
- Zapier to establish connections between different marketing and sales tools. In this case, between LinkedIn and your CRM.
- (Optional) LinkedIn Sales Navigator to save profiles and advanced searches.
- (Optional) Expandi. The top LinkedIn automation tool of choice for sales teams. With Expandi, you can automate certain tasks such as sending connection requests, follow-ups, and more. For example, if you have 20 leads in your CRM marked as “need to follow up”, you can do that automatically.
Below, we’ll cover some other solutions if you don’t use Sales Navigator too.
By the end of this guide, you’ll be able to save a lot of time as you won’t have to look up information about each prospect you’re communicating with on LinkedIn. Instead, you’ll leverage automation to do most of the work for you!
Here’s what we’ll cover:
- Why Integrate LinkedIn Sales Navigator With Your CRM
- How To Integrate LinkedIn Sales Navigator With HubSpot CRM Via Zapier
- Why Integrate Expandi With Your CRM And Company Data
- How To Integrate Expandi With Your HubSpot CRM

Using LinkedIn a lot?
Whether you’re doing outreach or generating inbound leads, you might want to join our private Facebook group, the LinkedIn Outreach Family. In it, other business owners and salespeople are constantly sharing the latest LinkedIn hacks and proven outreach campaigns, down to the exact templates used. See you inside!
Now, let’s get started!
Why Integrate LinkedIn Sales Navigator With Your CRM
If you’re a regular LinkedIn user, you probably know how to generate leads, make new connections, and grow your brand.
Obviously, all this includes interacting with a lot of people.
As such, if you want to stay on top of your LinkedIn marketing, you’ll want to keep notes on who’s who and/or anything else you need to keep in mind when messaging them.
According to HubSpot, 48% of salespeople never even make a single follow-up attempt. Meanwhile, 80% of sales require at least 5 follow-ups.
The point is: If you’re not using a CRM as part of your outreach, you’re potentially wasting a lot of time and money.
If you’re new to LinkedIn outreach in general, be sure to see our full guide on 7 essential LinkedIn outreach rules to keep in mind.
As a bonus point, there are certain LinkedIn tasks you can automate fully. Such as LinkedIn follow-ups and connection requests. But we’ll cover this in detail below, read on.
Other benefits of integrating LinkedIn with your CRM include:
- Trustworthy reporting on your leads, opportunities, and sales opportunities to track where each lead came from and their sales status. This can be useful if you have SDRs helping you too.
- Better knowledge of leads as you can create custom notes for each lead. For example, if there’s anything specific you need to mention during the sales call or if you need to follow up in 2 weeks. This, in turn, leads to better segmentation and more personalized communications.
- Simplified collaboration if you’re working with other employees in your organization. Your CRM records conversations, past interactions, notes, and other forms of data for each lead. And if it’s cloud-based, it’s always up-to-date and your employees can collaborate with you in real-time.
As a bonus point, you can also integrate your CRM with LinkedIn Sales Navigator to instantly pull data from your leads.
So, for example, if your sales development rep is doing LinkedIn prospecting, chances are, they’re doing so from their account.
By integrating your CRM software with LinkedIn, they can instantly pull the data on a lead to the CRM and have other people view and collaborate as needed. Alternatively, they might store personalization info in the CRM which the account executive might use later (e.g. during the outreach or sales call).
Either way, there are a lot of use cases and examples we can cover here.
So, let’s take a practical look at how to integrate Sales Navigator with HubSpot CRM.
How To Integrate LinkedIn Sales Navigator With HubSpot CRM Via Zapier
Sales Navigator is built to integrate seamlessly with your team’s daily sales and related workflows.
So, to integrate Sales Navigator with HubSpot CRM, here’s what you need to do:
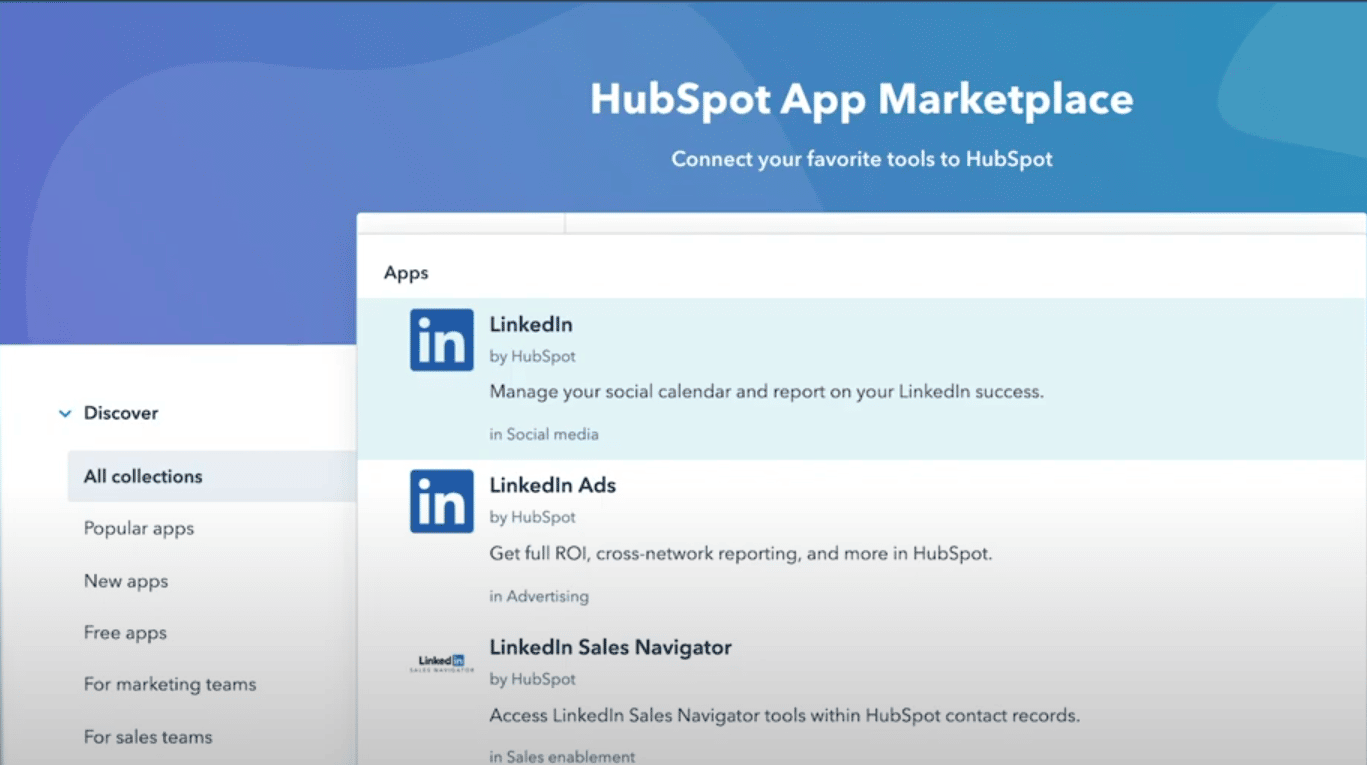
- In your HubSpot account, click on the Marketplace icon in the main navigation section and select App Marketplace.
- Using the search bar, type in LinkedIn and select Sales Navigator.
- Click Install app and select the Sales Navigator account with which you want to continue this integration.
Then, to view the LinkedIn data in HubSpot:
- Navigate to your contacts or companies
- Select the name of a contact or company.
- Locate your LinkedIn Sales Navigator section on the right panel. This should contain information for the contact or company.
- Then, to save the contact information to a list in Sales Navigator, click Save in Sales Navigator.
- Or, to access a more detailed view of a contact, click View more.
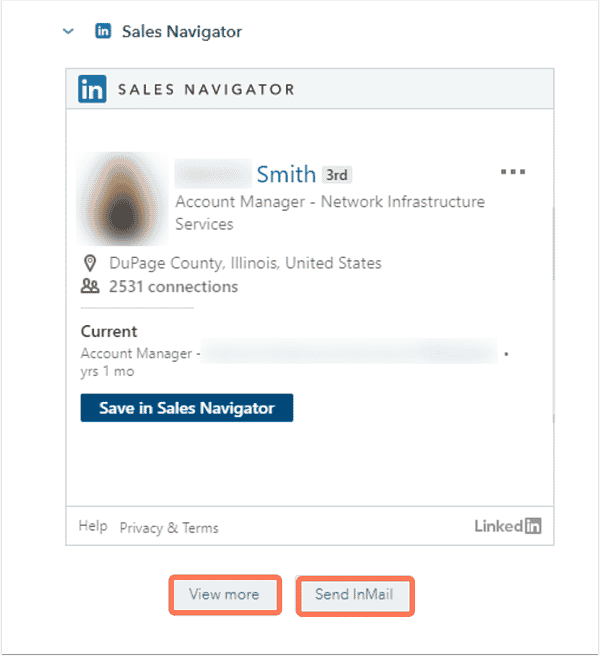
From there, you can also send InMails, set up icebreakers, find related leads, or include custom information about each prospect as needed.
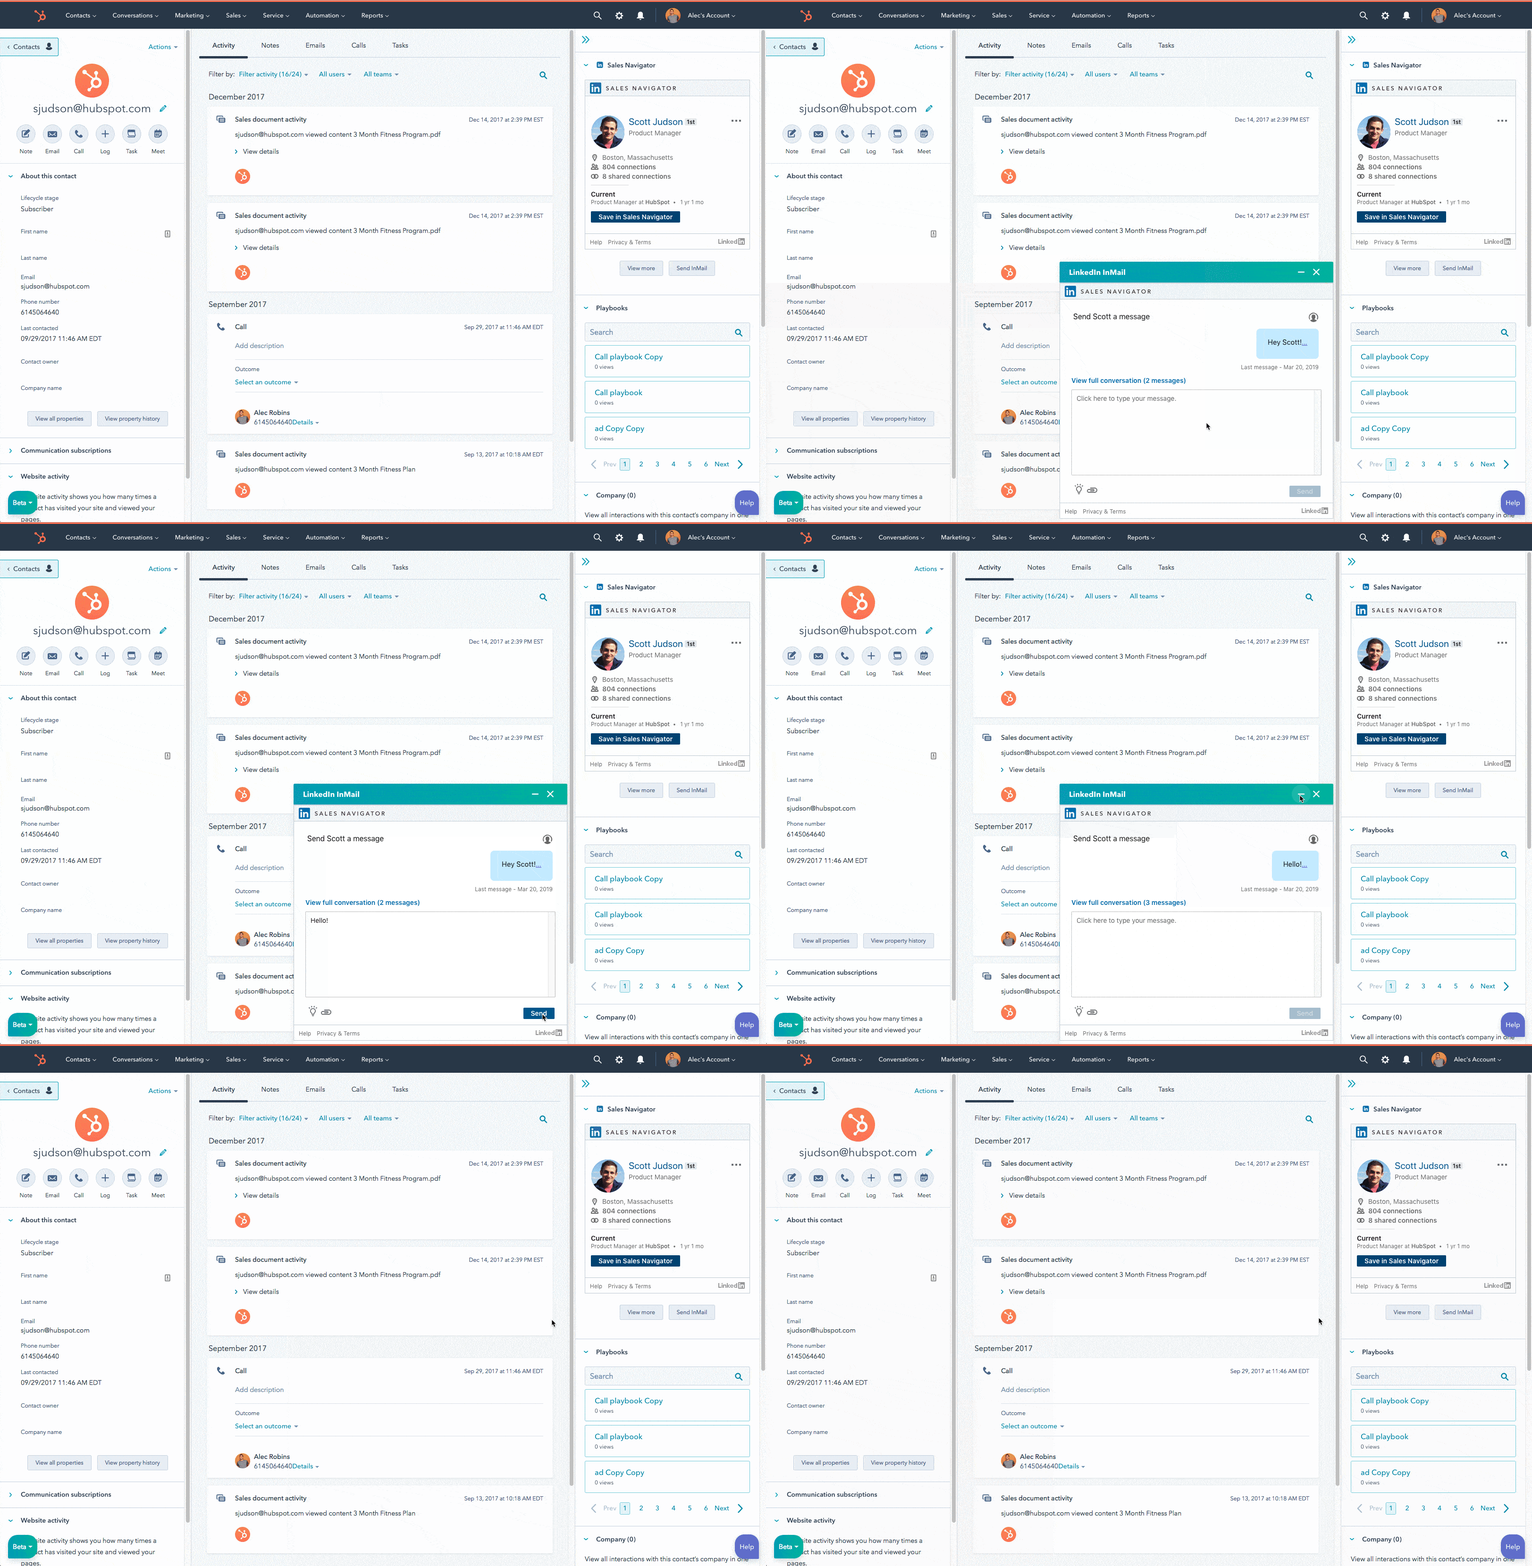
For a more detailed breakdown of the above, see HubSpot’s guide
Simple, right?
Now, let’s take a look at another way to do this. Which is with Make (formerly known as Integromat).
How to integrate Sales Navigator with Integromat (Make)
Make is a similar tool to Zapier (which we’ll cover below). Essentially, it helps you connect and automate your favorite apps in just a few clicks.
Naturally, this works for LinkedIn Sales Navigator and HubSpot CRM as well.
Here’s how:
- Authenticate your LinkedIn Sales Navigator account with Make here.
- Choose a trigger for LinkedIn, which will start your automation flow. Then, select the action this will lead to.
- Configure the data that is exchanged between LinkedIn and HubSpot.
- And finally, test and publish your integration.
Some of the trigger examples include:
- Watch CRM objects.
- Watch contacts added to the list.
- Watch engagement.
- Watch files.
- Watch notifications.
- And more.
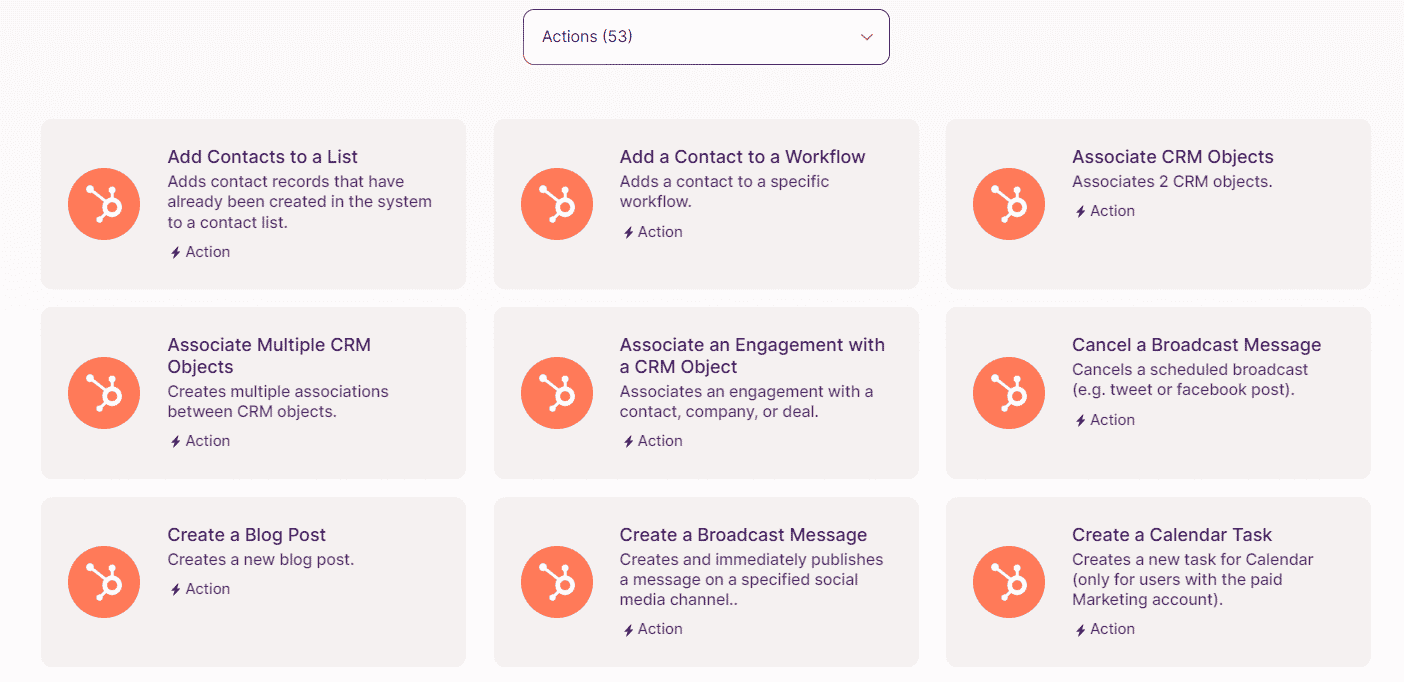
Some of the action examples, meanwhile, include:
- Add contact to the list.
- Add contact to workflow.
- Create a calendar task.
- Create record.
- Create or update contact.
- Merge contacts.
- And more.
So far, everything we’ve covered so far has to do with manual LinkedIn Sales Navigator actions.
For example, you commit to a certain action, and the CRM updates accordingly.
But now, to take this one step further, you can also automate your LinkedIn messages.
This way, for example, you can automatically reach out to a certain group of people while all of them get moved to the next stage in the CRM automatically as well.
Let’s take a look.
Why Integrate Expandi With Your CRM And Company Data
So, first things first, what IS Expandi?
Essentially, it’s one of the best LinkedIn automation tools on the market. The main differentiation is that it’s far safer than other tools on the market because it mimics human behavior.
Without getting too technical, let’s first look at some LinkedIn tasks you can automate with Expandi and then how to integrate Expandi into your CRM.
What tasks can you automate with Expandi?
One of the biggest benefits of including Expandi in your workflow and operations is that you save a lot of time automating manual tasks that might have otherwise taken up to 10-20 hours per week.
This includes LinkedIn tasks like:
- Sending connection requests.
- Sending follow-ups after a certain amount of days.
- Liking or commenting on a prospect’s post to get their attention.
- Endorsing someone’s skills.
- Following up automatically on email or InMail.
- Using hyper-personalized images or dynamic GIFs in your outreach.
- And more.
As we mentioned triggers and actions above, Expandi works in a similar way. In that, you can set up an “if-this-then-that” type of outreach sequence flow.
For example, you can automatically check if there’s an email associated with a LinkedIn profile. And if that’s the case, follow up via email in 3 days.
All this, of course, without you doing anything.
Sounds great?
Grab a free, 7-day Expandi trial now!
Because below, we’re going to explore how to integrate Expandi with your HubSpot CRM!
How To Integrate Expandi With Your HubSpot CRM
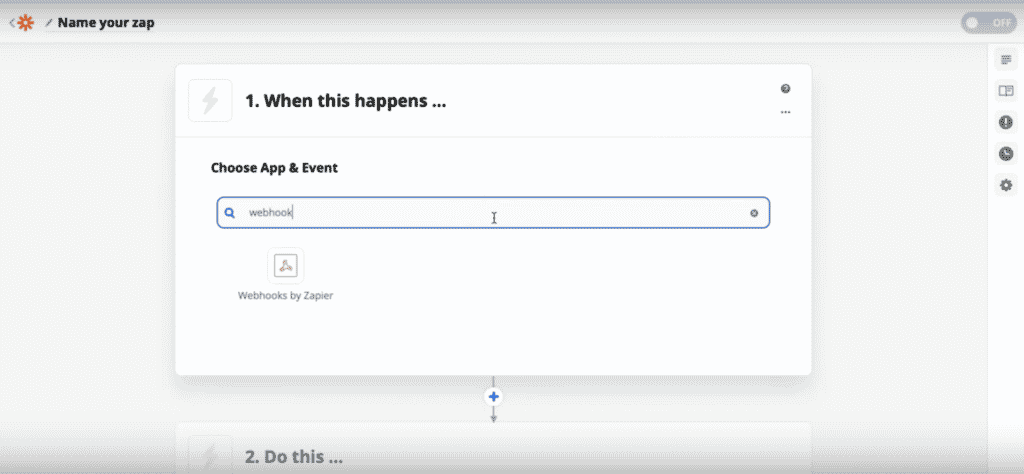
Now, here’s how to set up your Webhook in Zapier to connect to Expandi in your HubSpot CRM:
- Click on Make a Zap! And look up Webhooks by Zapier in the Choose App & Event box.
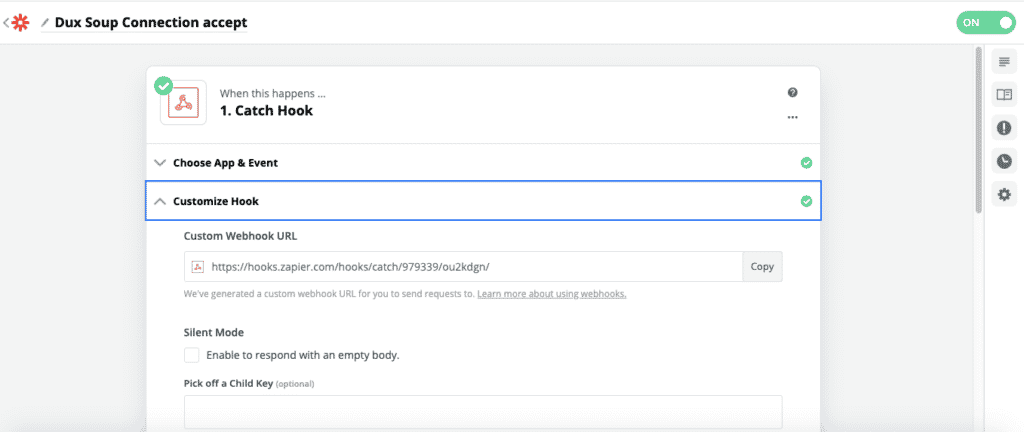
- In the next Choose Trigger Event section, select Catch Hook and then copy the Custom Webhook URL, which you’ll need later for Expandi.
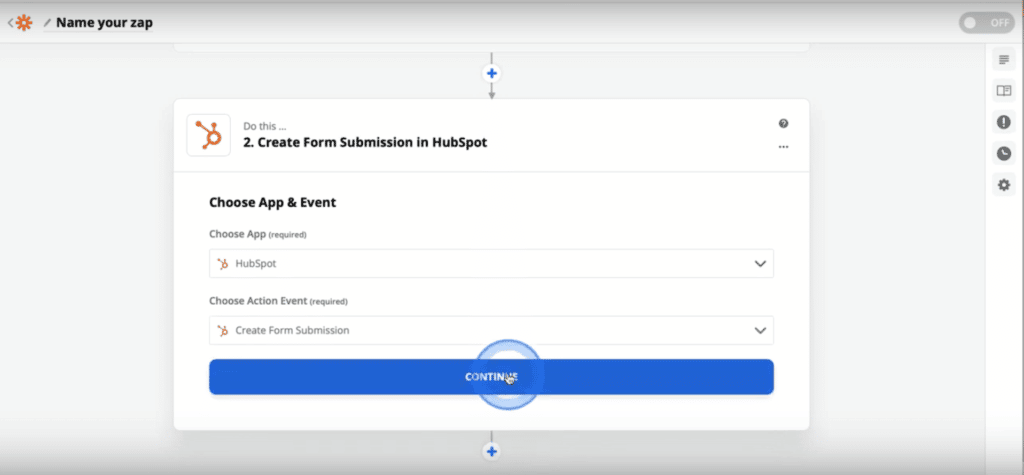
- From there, continue with the Zapier flow, skip test, and select your app (HubSpot CRM). As an example task, you can select Create Form Submission here.
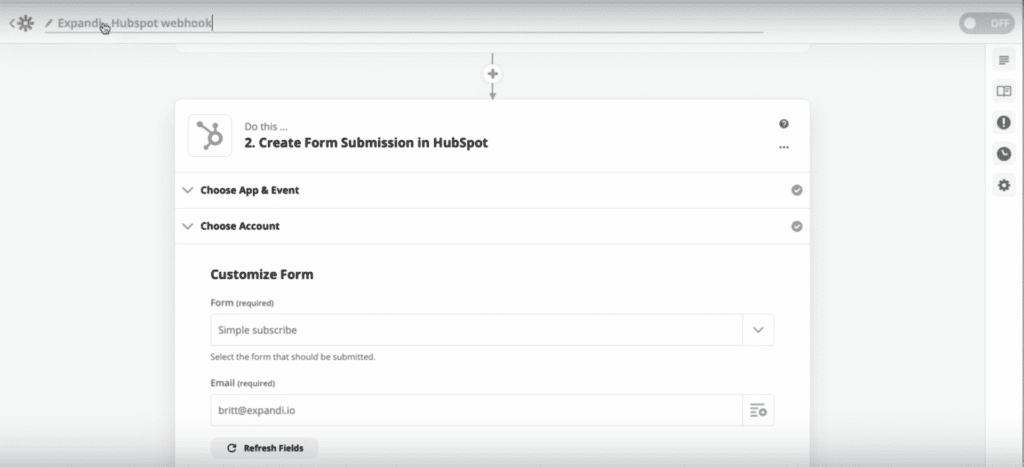
- Once done, connect your HubSpot CRM account, select simple subscribe in the first form, and input your email in the second form.
- Finally, click Test & Continue, and if everything is set up correctly, turn on the Zap.
Now, we’ll need to go back to Expandi.
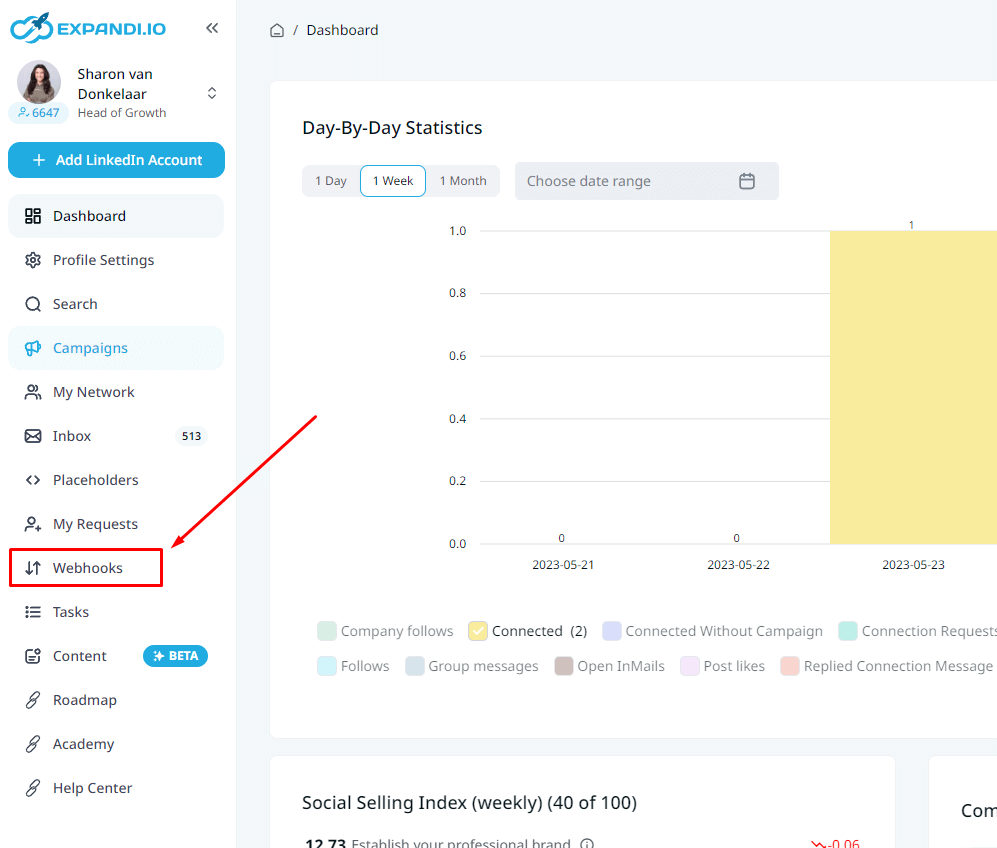
- Select Webhooks on the left menu of the dashboard.
- Here, you’ll want to add a new webhook.
- Then, create a new webhook for the correct campaign with the right event.
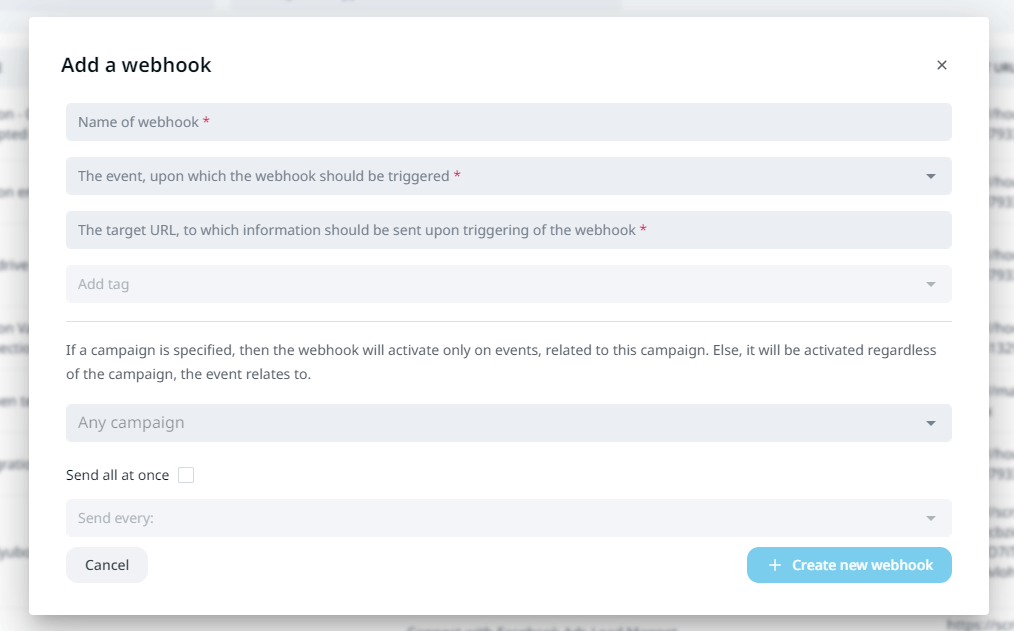
Events here include:
- LinkedIn account has no connection requests scheduled.
- LinkedIn account has no message scheduled.
- LinkedIn account has nothing scheduled.
- Campaign finished.
- Connection request accepted by contact in active campaign.
- Contact replied to campaign message.
- Company follow sent.
- Contact tagged.
- Contact disconnected.
- Email bounced.
- Email clicked.
- Email opened.
- Email sent.
- Endorsement sent.
- Contact replied the first time since start.
- Follow sent.
- Message sent.
- Connection request accepted.
- Post liked.
- Contact replied.
- Connection request sent.
- Contact revoked.
- Visit sent.
For the target URL, simply paste the Custom Webhook URL from Zapier and you should be good to go!
As a bonus step, you can also connect Expandi to Slack so that your whole organization can get a notification whenever someone accepts your connection request or replies.
Though, for a detailed breakdown of that, see our full guide on essential steps to prepare before launching a LinkedIn outreach campaign.
Conclusion
And that’s a wrap!
Hopefully, this guide to LinkedIn integrations was helpful and you have a better understanding of how you can improve your automation now.
The above is just one example of how you can combine LinkedIn, automation, and your CRM to take efficiency to the next level.
Usually, this includes LinkedIn Sales Navigator, a CRM of your choice (we use HubSpot), and another automation tool (Expandi is ideal for LinkedIn).
Speaking of, are you ready to start generating leads on autopilot?
If so, be sure to sign up for a free, 7-day Expandi trial now!
That is more than enough to fully implement the above steps and see the results of your automation efforts.
Alternatively, if you’re looking for more tips and tricks on how to get the most out of LinkedIn as a marketing channel, be sure to join our private Facebook group the LinkedIn Outreach Family! In it, we constantly cover the latest, proven outreach campaigns and other steps you should take to improve your outreach campaigns!
You’ve made it all the way down here, take the final step
