10+ Best Practices to Organize Email Messages – Expandi
Don’t you sometimes wish that you could click one button that would magically organize your email messages and inbox?
Well, the bad news is that that’s not how it works.
But the good news is that by the end of this guide, you’ll have a much better idea of how to organize your email messages and finally regain control of your inbox.
Email is one of the best communication tools in your business arsenal.
But if your inbox looks anything like this, chances are, it’s hindering your productivity.
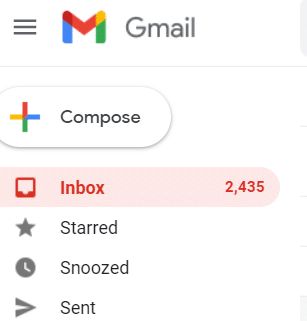
According to McKinsey research, the average professional spends 28% of their workday reading and answering emails.
For an average full-time worker in America, that’s around 2.6 hours per day.
Which is to say – way too much time!
Business leaders, CEOs, and managers often receive hundreds, if not thousands, of emails a day.
And leaving them unattended leads to a cluttered email inbox – full of old, unread, and possibly essential messages you missed, which will only frustrate you more.
To that, we say “no more!”.
By the end of this guide, you’ll know how to set up automatic filters, inbox rules, how to achieve inbox 0 finally, and more.
Here’s what we’ll cover:
- How to Organize Your Email: Gmail Features Overview And How They Work
- Top 10+ Best Practices And Advice For Keeping Your Email Messages Organized
PS – Are you in our private Facebook group yet?
Join the LinkedIn Outreach Family for more email marketing tips and tricks. As well as all things outreach to better reach your leads.
Now, let’s get this ultimate guide to organizing email messages started!

How to Organize Your Email: Gmail Features Overview And How They Work
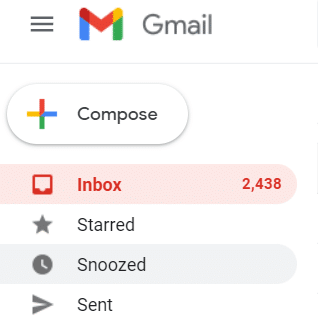
Before we get into the tips and tricks, let’s first look at the in-built Gmail features that you can use to manage your inbox better.
Gmail has more features than many people realize.
And if you’re not sure where to begin with organizing your email messages, it might be worth familiarizing yourself with the most important Gmail features first.
Surprisingly, you can accomplish a lot from scheduling emails to selecting messages in bulk without any third-party tools or extensions.
But don’t worry, we’ll cover the latter below as well.
First, let’s look at how email organization works and some essential Gmail features you can use to organize your inbox.
What is email organization and why it matters
First of all – what is email organization, and why does this matter in the first place?
Email organization is the simple sorting process through your inbox and prioritizing specific messages based on importance, category, labels, etc.
For example, having your work emails and personal newsletters you’re subscribed to in the same bucket is a sure way to get overwhelmed.
Seeing you have 100+ unopened emails, whether they’re from work or newsletters, would just make getting started much harder!
And even if you’re the type of person who knows which emails are important in an inbox of 1,000+ unread messages, you’re sure to get swamped sooner or later.
So, properly organizing your email messages help you:
- Increase your productivity and efficiency in the workplace.
- Save time knowing where to look for certain emails based on a particular project.
- Make sure you’re not keeping someone waiting for a reply.
- Save space on the Gmail inbox storage. Every Google Account comes with 15 GB of storage shared across Google Drive, Gmail, and Google Photos. Though relatively small, Gmail messages can still contribute to that size limit.
- And much more.
Now, let’s cover some in-built Gmail features that can help declutter your inbox.
5 Gmail features to organize your inbox
Gmail offers numerous useful features that can make your email experience as smooth as possible and boost productivity.
Even a simple “pause” button until you clear up your inbox can significantly boost your productivity.
Here are some useful features you can use to organize your email messages:
- Spam filtering – Spam is another name for junk in email. Gmail uses advanced technologies to keep spam emails out of your inbox to keep things simple. Without you doing anything, Gmail automatically sends emails that look like spam to a separate spam folder, and 30 days later, it’s deleted automatically as well.
- Conversational view – An email conversation is whenever you send emails back and forth with another person (or group of people), often about a specific topic. Gmail groups these emails together by default to keep your inbox more organized.
- Built-in chat – Instead of sending emails, you can send someone instant text messages or even use the voice or video chat feature to get your message across.
- Call phone – This is similar to voice chat, except it allows you to dial an actual number to call any phone in the world. It can be a great alternative to Google Hangouts or Zoom Calls.
- Gmail filters – We’ll cover this in more detail below. But essentially, you can use custom filters to track and separate emails based on custom tags, labels, or different categories in your inbox.
Though, if an email chain is no longer relevant, you can simply archive or delete it.
What’s the difference?
Let’s take a look.
When to archive or delete your Gmail emails
Whether you archive emails or delete them, they disappear from your inbox.
Surprisingly enough, many people don’t know the difference or when to use each feature.
Let’s cover that quickly before taking a look at the best practices below.
A deleted email goes directly into the trash folder, after which it’s deleted automatically after 30 days.
An archived email goes into the Archive folder, which, by default, is NOT automatically emptied.
- When to delete – Delete emails if they no longer need a reply, update, or any of your participation. As a rule of thumb, if a message is more than a few weeks old, it doesn’t contain anything important, and it’s just taking up space in your inbox. If it contains some vital information you want to remember, you can simply save the email as a PDF or copy its content to your notes.
- When to archive – Most people use the archive function to clean up their inboxes without deleting emails. This can be useful if you want to set aside an important email and don’t want it to declutter your inbox.
Now, if you feel like the Gmail notification badge on your phone never goes away, here are 11 best practices you’ll want to keep in mind when organizing your email messages.
Top 10+ Best Practices And Advice For Keeping Your Email Messages Organized
From quickly pulling up messages from the same sender to setting up custom filters and rules, here are some of the best practices that can help you organize your email messages:
- Create custom Gmail filters
- Create custom labels to categorize your emails
- Consider the Inbox Zero email organizing method
- Snooze emails that don’t need your immediate attention
- Turn on Gmail Nudges, so you don’t miss important emails
- Star important emails, so they stand out more
- Whitelist domains so they always end up in your inbox
- Create different email aliases using the plus sign in Gmail
- Use a Gmail inbox type that’s right for you
- Explore Gmail add-ons and browser extensions
- Consider taking the conversation to LinkedIn
Now, let’s take a look at each step in detail.
1. Create custom Gmail filters
What are Gmail filters?
Essentially, filters in Gmail allow you to redirect emails as soon as they land in your inbox. This can then save you the trouble of manually sorting and organizing emails one by one.
Let’s say you receive a lot of marketing newsletters. If they’re coming from a specific domain, you can make it so that they’ll automatically land in a specific inbox or label.
Alternatively, you can also use Gmail filters to find specific emails in your inbox based on:
- Who they’re from.
- Who you sent the email to.
- Specific words the email includes.
- Email or attachment size.
- Certain timeframe or date.
- Which inbox they’re in.
- And more.
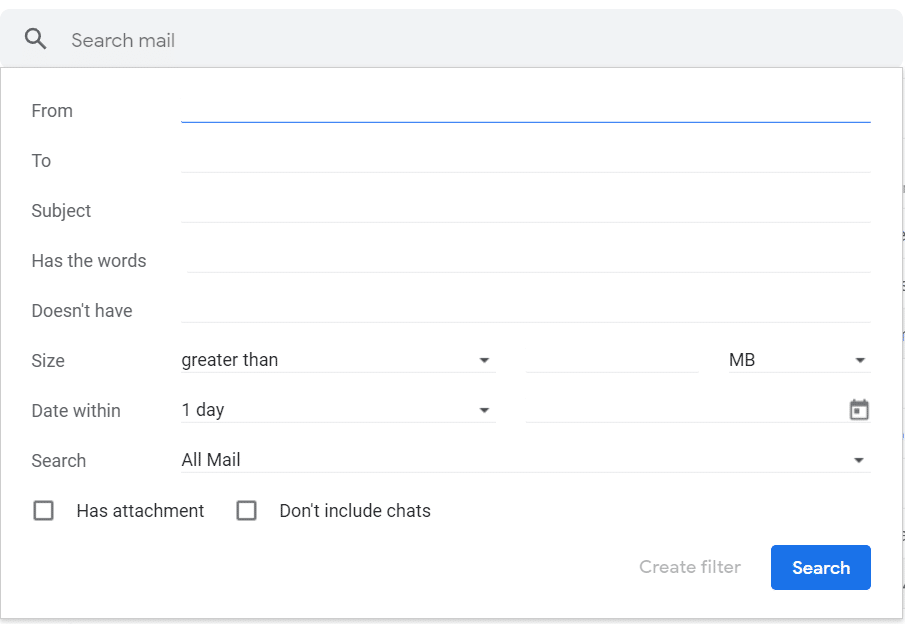
Here’s how this works:
1. Click on the menu icon next to the search interface in Gmail.

2. Then, you can create filters based on specific keywords or options mentioned above.
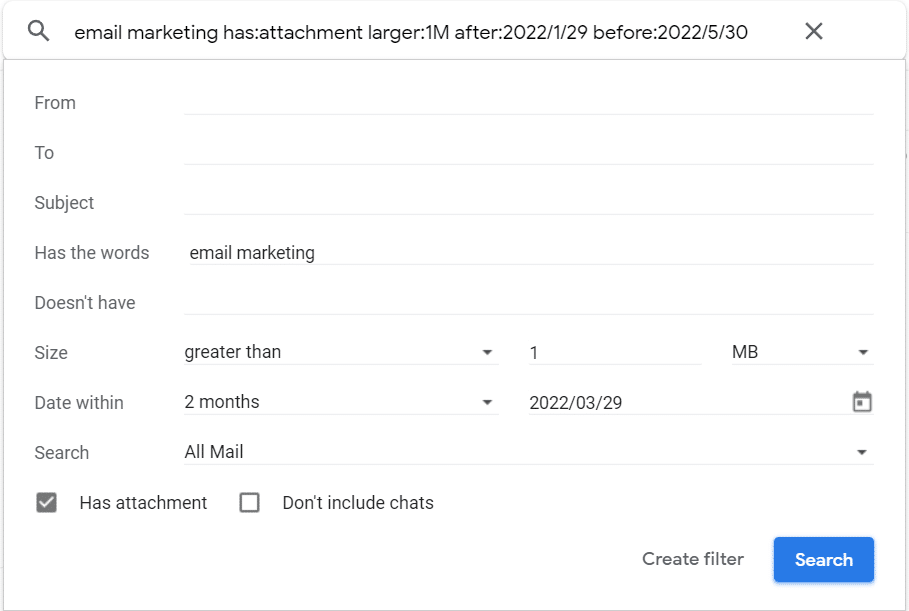
For example, you could do it this way if you wanted to track down a specific email sent within the last 2 months that had a PDF attachment about email marketing large than 1MB.
Another thing you can do here is to create filters to automate specific actions within your inbox.
For example…
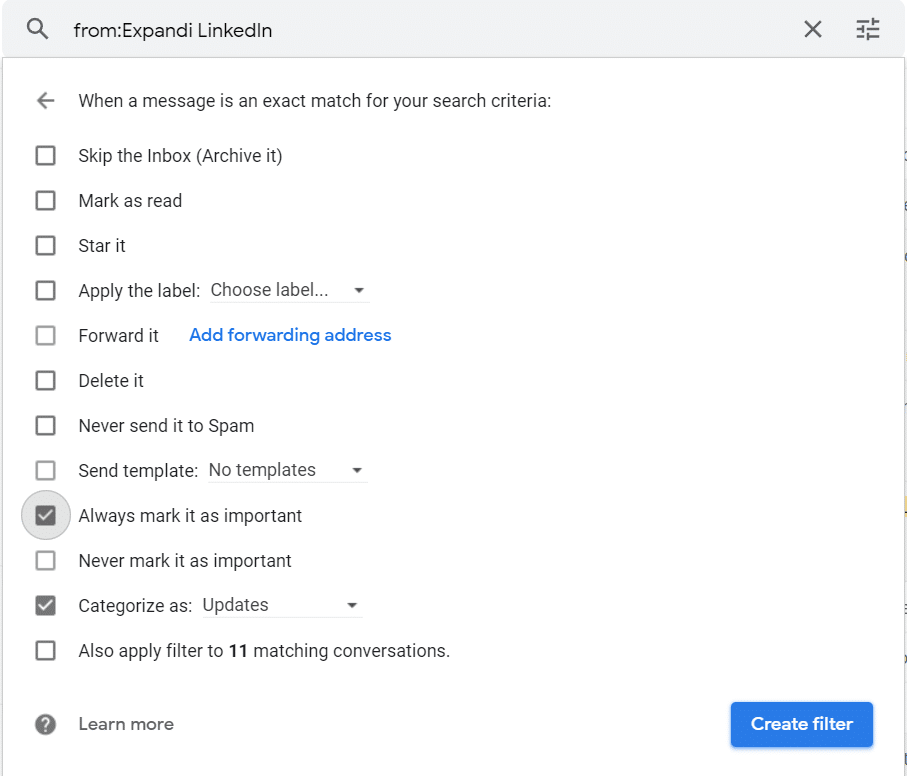
When a message is an exact match for your search criteria, you can make it so the email:
- Skips the inbox (Archives it).
- Is marked as read.
- Is starred automatically.
- Applies a certain label.
- Is forwarded to a different address.
- Is deleted.
- Is never sent to spam.
- Is sent to a specific template.
- Is always or never marked as important.
- And is automatically categorized.
For example, you could make is so that all emails that contain the keyword “LinkedIn” and are from the Expandi domain would automatically get sent into your Updates or Marketing inbox.
Of course, this is just the tip of the iceberg when it comes to Gmail filters.
Once you get into its details, you’ll find there are many more custom filters you can set up to automate organizing your email messages.
Now, let’s take a look at some other best practices.
2. Create custom labels to categorize your emails
It’s easy to use Gmail labels as folders and just as easy to add multiple categories for your email messages.
For this, you can use Gmail labels.
Adding labels is similar to putting sticky notes on an important document. And moving an email to a label works the same way as moving a file into a folder.
For example, you could have different labels for your newsletters, vacation plans, work projects, and more.
This is a sure way to help save time when skimming through your inbox, as you’ll know where to look.
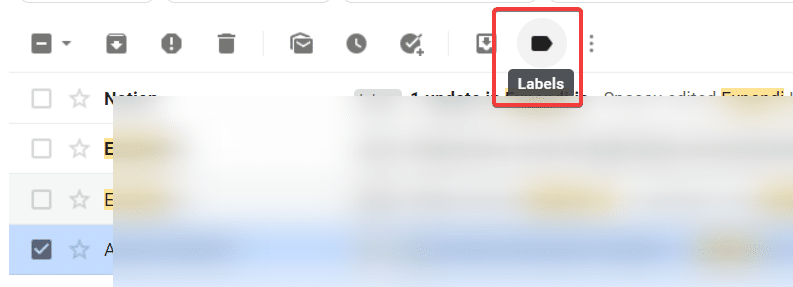
Here’s how to add or create labels inside Gmail to better categorize your messages:
- Open Gmail.
- Select the email message you want to add to a label.
- Click the label icon at the top of your screen and select accordingly. Or you can simply right-click an email message to find the “label as” feature.
By default, Gmail labels include Social, Updates, and Forums.
To create new labels in Gmail, simply select an email message, click on the label icon, and then Create new.

From there, you’ll be asked to enter a new label name or nest a label under a current label category.
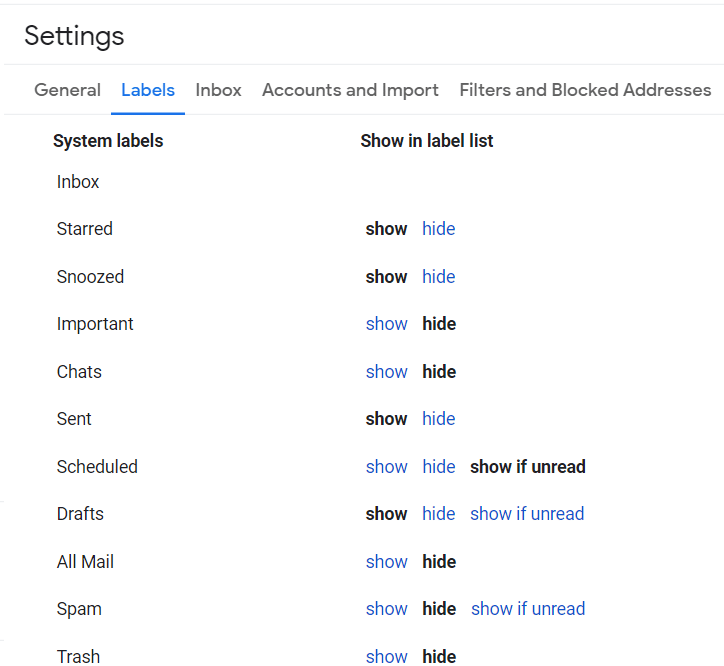
If you’re looking for something more advanced, you can manage labels for a detailed overview of your system labels. Here, you’ll find what you can show or hide under your labels.
In short, creating custom labels can be a great way to categorize your messages and declutter your inbox.
So, the next time you open Gmail, you’ll have different label emails instead of a messy inbox in a much more manageable manner.
Some of the most common Gmail labels include:
- Newsletters.
- Personal.
- Personal projects.
- Work projects.
- Freelance clients.
- Travel plans.
- Gifts.
- Archive.
- And more.
As a cherry on top, you can combine this with step #1 we covered above to label and sort your email messages automatically. To do that:
- Click show search options in the search box at the top.
- Enter a keyword to match specific messages. For example, all emails contain the word “marketing” or if they’re from a certain domain.
- Click Create filter.
- Scroll to Apply the label and choose a label.
- Finally, click Create filter, and you’re done!
This way, you won’t have to organize your emails one by one or manually sort through your inbox!
Though, if you want to take a more extreme measure to email management, one piece of advice for organizing your messages has to do with Inbox Zero…
3. Consider the Inbox Zero email organizing method
What’s Inbox Zero?
Essentially, it’s an email management methodology (or a philosophy) that aims to keep the inbox empty or as close to empty as possible at all times.
The term “Inbox Zero” was coined by Merlin Mann on his blog and podcast 43 Folders.
In it, his advice for organizing email messages is that by having a more casual relationship with your inbox, you’re more likely to improve time management and get more out of your inbox.
He argues that your email inbox isn’t a task management system, even though most people use it that way.
The real beauty of Inbox Zero has to do with Mann’s advice of shifting your approach to organizing emails altogether.
So, instead of a to-do list, you could take the following steps when organizing your email messages.
- Unsubscribe to any email newsletters you don’t read.
- Designate specific timeframes for checking your email and clearing your inbox. For example, once in the morning or the evening.
- Change your email notification settings to not constantly check your inbox or phone.
According to a report by Asana, 80% of global knowledge workers default to working with their email inboxes open.
By default, when we get a notification, we’re wired to check it immediately, regardless of what we were doing.
Then, we have to give it time and thoughts to reply, delete, label, or come back to it later.
Essentially, email can be a huge time sink and a distraction.
Depending on your workflow, there might be certain work emails that you’ll need to reply to immediately.
But for the most part, most people are more distracted by email than they realize.
Some other best advice that follows implementing Inbox Zero is identifying 4 possible actions you can take for each incoming email:
- Delete it – If an email doesn’t require action from you or any information you might need later, delete it immediately.
- Delegate it – If you’re not the correct person to respond to the email, delegate it by forwarding it to the right person. Then, archive or delete.
- Do it – If the email requires some action from you and you’re the right person for it, try to respond to it immediately. Then, archive or delete.
- Defer it – Finally, if you’ll need more time to respond to the email or type up a longer response, you can sort it to a different label, snooze it, or come back to it later. Just make sure you don’t hoard too many emails without replying to them.
Hopefully, with these actionable tips and advice, you’re less likely to hoard emails in your inbox now!
4. Snooze emails that don’t need your immediate attention
Did you know you could “Snooze” emails in Gmail?
This is directly tied in to step 3 mentioned above.
With Gmail’s Snooze feature, you can make certain emails disappear for a while and then come back to the top of your inbox at a time you pick. As if you received it all over again.
Whether you’re following Inbox Zero or just receiving emails all day long, you can snooze emails so that you can go through them one-by-one in the evening. When you’re almost done with work.
Here’s how to snooze emails in your browser:
- Hover over the email you want to snooze in Gmail.
- Click on the clock icon on the right.
- Select a date and a time you want to snooze the email until.
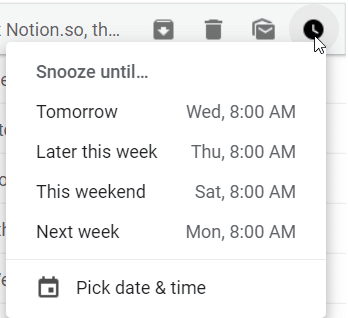
If none of the times shown fit when you want to receive the message, you can pick a custom date & time to set your own, which can be weeks or months ahead.
But if you change your mind or want to un-snooze an email, you can find those emails in the Snoozed folder on the left.
5. Turn on Gmail Nudges so you don’t miss important emails
If you’re getting a lot of emails daily, the Nudge feature can be a helpful way to stay organized.
Nudges can be a great way to get reminders if you haven’t sent a reply or a follow-up to a vital email yet.
Unlike the Gmail Snooze, Nudges are for emails you might have forgotten to reply to or tick off. And it’s done automatically, so you won’t even have to snooze emails manually.
Our advice for organizing emails is to use both Nudges and the Snooze feature.
There are 2 kinds of Nudges in Gmail, which you can find in the settings:
- Suggest emails to reply to – Emails you might have forgotten to respond to will appear at the top of your Gmail inbox.
- Suggest emails to follow up on – Sent emails that you might need to follow up on will appear at the top of your Gmail inbox.
To modify your Nudges settings, go to All Settings in Gmail, and scroll down until you see Nudges.

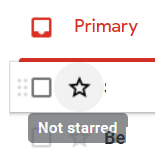
6. Star important emails so they stand out more
Another advice for organizing emails is to simply star important messages that are more important to you than others.
Depending on the state of your inbox, this can be a great way to know at a glance which emails are more important than others.
Though, what you should know about this feature is that Gmail automatically marks important emails, depending on its algorithm. But the platform still manages to get things wrong sometimes, and it’s not always accurate.
So, to make the algorithm work for you, consider tagging important messages yourself. One way to do this is by manually adding or removing the importance markers or starring messages.
This is as simple as clicking the star icon on the left of your emails.
7. Whitelist domains so they always end up in your inbox
This is especially useful if you want to receive emails from specific domains in your Primary inbox. And not in the Social, Promotions, or Spam folders.
For example, if you subscribed to an important newsletter but emails from that domain keep landing in your Promotions inbox, you can make it so that they prioritize the Primary folder automatically.
To do that, simply go to your Social or Promotions inbox, select an email from that domain, and drag and drop it into your Primary section.
Like so.
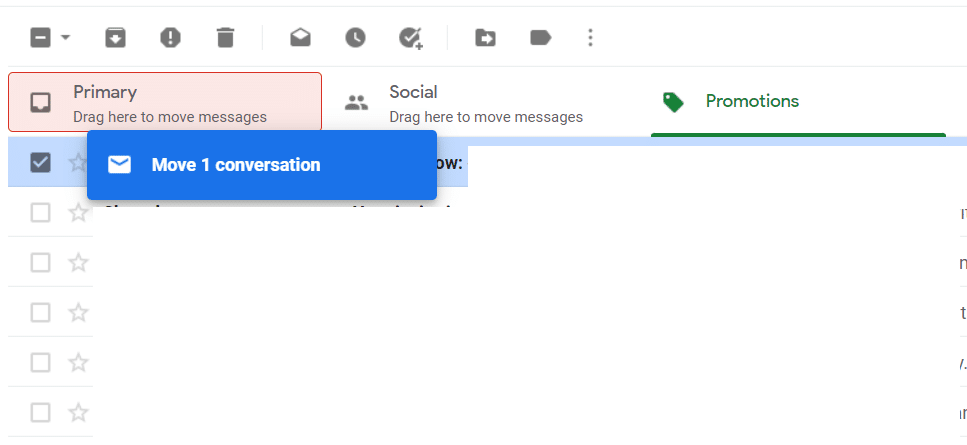
This will make it so that emails from that domain will automatically try to land in your Primary folder instead!
If you’re subscribed to many newsletters that end up in Promotions, our advice is to whitelist a few domains like this so that your inbox is better organized.
8. Create different email aliases using the plus sign in Gmail
Another way to organize and categorize your emails is with the plus sign.
Essentially, you can create different email versions by adding the plus sign and any combination of words or numbers in your Gmail username.
This way, you can have a different email for friends, work, or personal projects, under one domain!
Here’s how you can modify an example email of [email protected]:
You can filter email messages from different senders and declutter your inbox from getting overwhelmed.
9. Use a Gmail inbox type that’s right for you
Most people only ever stick to the default inbox type.
But did you know you could change the display density option for your inbox emails?
To do that, click on the cog icon in the top right corner of Gmail, and from there, you can customize your inbox accordingly. Down to the density type, theme, inbox type,and reading pane.
The density options include:
- Default – Lets you view the names and file types of attachments under subjects. It also lets you open attachments directly from your inbox.
- Comfortable – Indicates the presence of attachments with a small paperclip icon, but you can’t get the preview of attachment files inside an email.
- Compact – More narrow view of your inbox if you want to see more email messages simultaneously.
Below, you can also set up a reading pane in your inbox. This lets you keep your inbox in view while reading and replying to emails.
Our best advice would be to experiment with a few different viewing settings to see what works for you best.
10. Explore Gmail add-ons and browser extensions
Did you know Gmail has many add-ons and third-party extensions that can make organizing your inbox a breeze?
You can find these useful add-ons in the Google Workspace Marketplace. But you can also filter for extensions that work with Google Drive, Calendar, Docs, Sheets, Slides, Forms, and more.
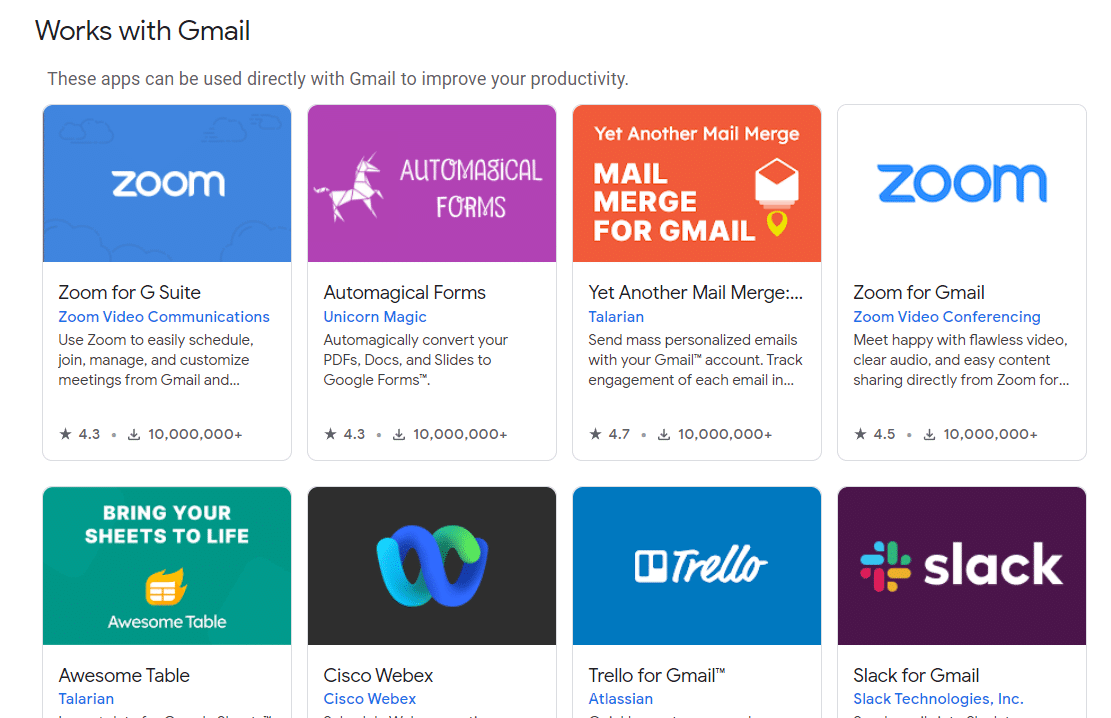
By installing the right Gmail add-ons, you can make your inbox even more powerful and organized than it already is.
On the marketplace, you’ll find email version tools of some of the most commonly used apps like Slack, Zoom, Trello, etc.
Our advice would be to go through the apps and see what might integrate with your workflow.
Otherwise, it’s far too easy to install many extensions and end just up making your inbox more cluttered.
Some of our favorite add-ons for Gmail include:
- Slack for Gmail.
- Inbox Pause.
- Checker Plus for Gmail.
- Auto Text Expander.
- Yet Another Mail Merge.
- Asana for Gmail.
- And more.
But there are many more apps in the marketplace, so be sure to give it a look!
11. Consider taking the conversation to LinkedIn
Last but not least, our final advice for organizing your email messages is to think outside the box and take some of your conversations to LinkedIn!
If you find yourself stuck in email threads with 10+ replies, it’s going to be more productive to take the conversation to LinkedIn or Slack. As long as it’s outside your email inbox.
Then, inbox management becomes considerably easier than having to track down certain emails or creating custom filters.
However, you can take one other step here to optimize your message organization even more…
And that is to use smart LinkedIn automation tools in your favor.
LinkedIn automation can help you automate certain actions on that platform to keep this short.
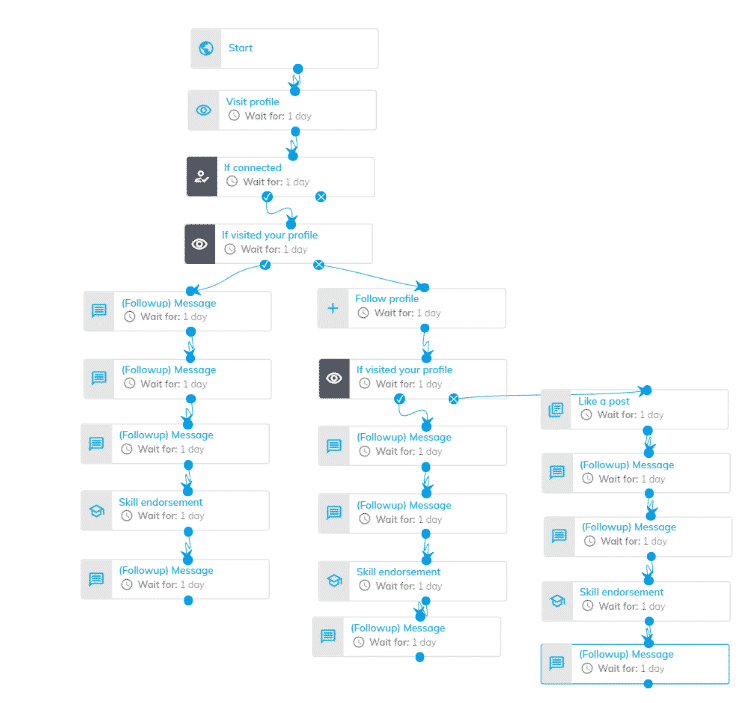
Based on “if-this-then-that” marketing flows, your actions are put on autopilot, saving you a lot of time on manual tasks.
Things like connecting with your leads, automatically replying or following up, automating email outreach, and more.
But that’s not all.
You can also make it so that:
- You automate reaching out and connecting on LinkedIn.
- And then follow up with an email.
Or vice-versa:
- Send a cold email first.
- Then automate reaching out to on LinkedIn.
Now, these flows can get as complicated or as simple as you’d like.
So, if you’re looking to take it up a notch, check out our complete guide to marketing funnel automation for more info and outreach templates you can copy
Conclusion
That’s a wrap!
Hope our best practices and advice for organizing your email inbox were useful.
Email is one of the best communication channels you can use. So, it’s worth considering the above to become a more effective email communicator.
But overall, our best advice would be to experiment with different email and project management methodologies or frameworks and see what works for you best.
You’ll know how to set up custom filters and labels based on your inbox yourself.
Now, if you’re looking for even MORE best practices for organizing your email messages, be sure to join our private Facebook group the LinkedIn Outreach Family. You’ll learn all the latest templates, tips and tricks, and the most up-to-date marketing hacks inside. For LinkedIn as well as email.
Finally, if you’re looking to take your cold outreach to the next level, be sure to sign up for a free Expandi live demo or gain access to a free, 7-day trial to automate your sales outreach now!
Expandi integrates with email as well. And when doing outreach, you’ll be able to receive your campaign metrics and results all in one place. So that you can understand how your campaign is performing at a glance.
You’ve made it all the way down here, take the final step