How to Use LinkedIn Sales Navigator in 2026 [Prospecting Guide]
Most SDRs and sales leaders using Sales Navigator are wasting half of its capability. They run a basic title + location search, export the URL, and call it a prospecting strategy.
Sales Navigator has 50+ filters, AI-powered lead intelligence, real-time buyer signals, and intent data built in. Most people use maybe 10% of that. I’ve run LinkedIn outreach campaigns across dozens of B2B use cases, and the gap between how people use this tool and what it actually does is one of the biggest missed opportunities in B2B outbound.
This guide covers the full picture: from setup and pricing to the filters, tactics, and Expandi workflows that move the needle for your outreach campaigns.
- Where LinkedIn Sales Navigator fits in your outbound stack.
- LinkedIn Sales Navigator pricing (2026 updated).
- How to set up Sales Navigator properly for prospecting.
- Main key filters and features for prospecting.
- Actionable Sales Navigator tactics for outreach.
Key Takeaways
- Sales Navigator is only as good as the filters you layer. Spotlight filters like “Posted on LinkedIn” and “Changed jobs in last 90 days” separate active buyers from dead-end lists.
- Saved searches turn Sales Navigator into a self-refreshing pipeline. Set your ICP criteria once and let weekly alerts do the work.
- Boolean search, View Similar, and intent signals give you targeting precision that free LinkedIn search can’t match.
- Copy any Sales Navigator search URL into Expandi to automatically pull the lead list and launch automated connection requests, follow-up sequences, and multichannel outreach from one place.
How to Use LinkedIn Sales Navigator in 2026 [Prospecting Guide]

Where LinkedIn Sales Navigator fits in your outbound stack
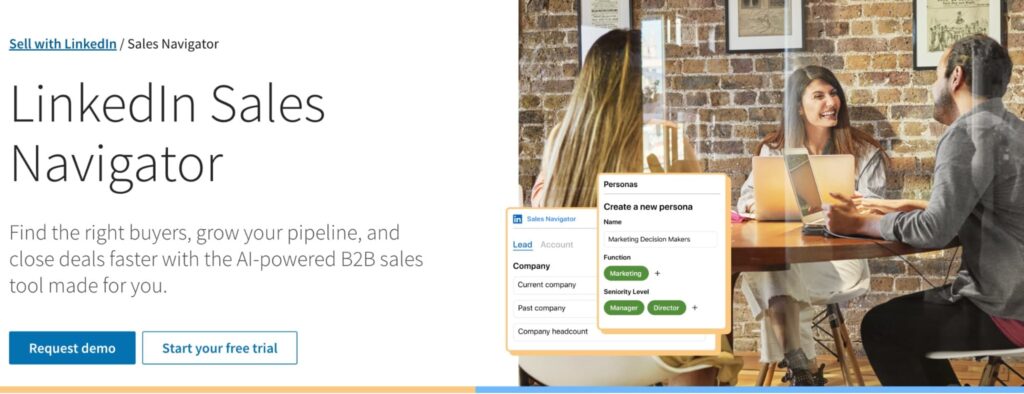
Sales Navigator is LinkedIn’s premium prospecting tool for B2B sales. It sits on top of LinkedIn’s 1B+ member network and gives you the search infrastructure, lead tracking, and outreach capabilities that the free version doesn’t have.
Where it fits in your stack matters though. Sales Navigator is a sourcing and intelligence layer. It finds the right people, surfaces buying signals, and tells you when to reach out. It doesn’t run your outreach for you.
That’s where tools like Expandi come in.
The typical workflow looks like this:
- Build a precise search in Sales Navigator for your targeted leads.
- Copy the URL.
- Import it into Expandi.
- Attach an outreach sequence.
- And let the outreach run automatically.
Sales Navigator handles the “who and when.” Expandi handles the “how and at what scale.”
Without that second layer, you’re still sending connection requests one by one, which defeats the point of having a prospecting tool this powerful.
The ROI case for Sales Navigator is well-documented. According to LinkedIn’s commissioned Forrester study:
- Sales Navigator delivers a 312% ROI over 3 years and pays for itself in under 6 months.
- Users see an average year-over-year revenue increase of 8%, with Sales Navigator’s share of revenue attribution growing from 20% in year 1 to 30% by year 3.
- Engaging buyers who show intent signals leads to 71% higher InMail response rates and 22% higher win rates.
We’ll get into the specific filters and Expandi workflows that produce those results, but first, here’s what it costs.
LinkedIn Sales Navigator pricing in 2026
LinkedIn Sales Navigator pricing can vary by region and is subject to change, so always verify your local price before committing. That said, here are the latest pricing plans as of writing:
| Plan | Monthly | Annual (per month) | Best for |
|---|---|---|---|
| Core | $119.99 | $89.99 | Individual sellers, solopreneurs |
| Advanced | $159.99 | $149.99 | Sales teams, CRM users |
| Advanced Plus | Custom | Custom | Enterprise, deep integrations |
A few things worth knowing before you commit:
- Free trials are available for Core and Advanced, but only if you haven’t had a paid LinkedIn subscription or used a trial in the past 365 days.
- Annual billing on Core saves 25%. Advanced annual saves just around 6%.
- Advanced Plus is best for sales teams using CRMs like HubSpot, Salesforce, Oracle Sales, or Microsoft Dynamics 365 who need advanced integration and CRM writeback.
For a full breakdown of all LinkedIn plans including Recruiter and Premium, see our guide on LinkedIn account types.
Is Sales Navigator worth the price?
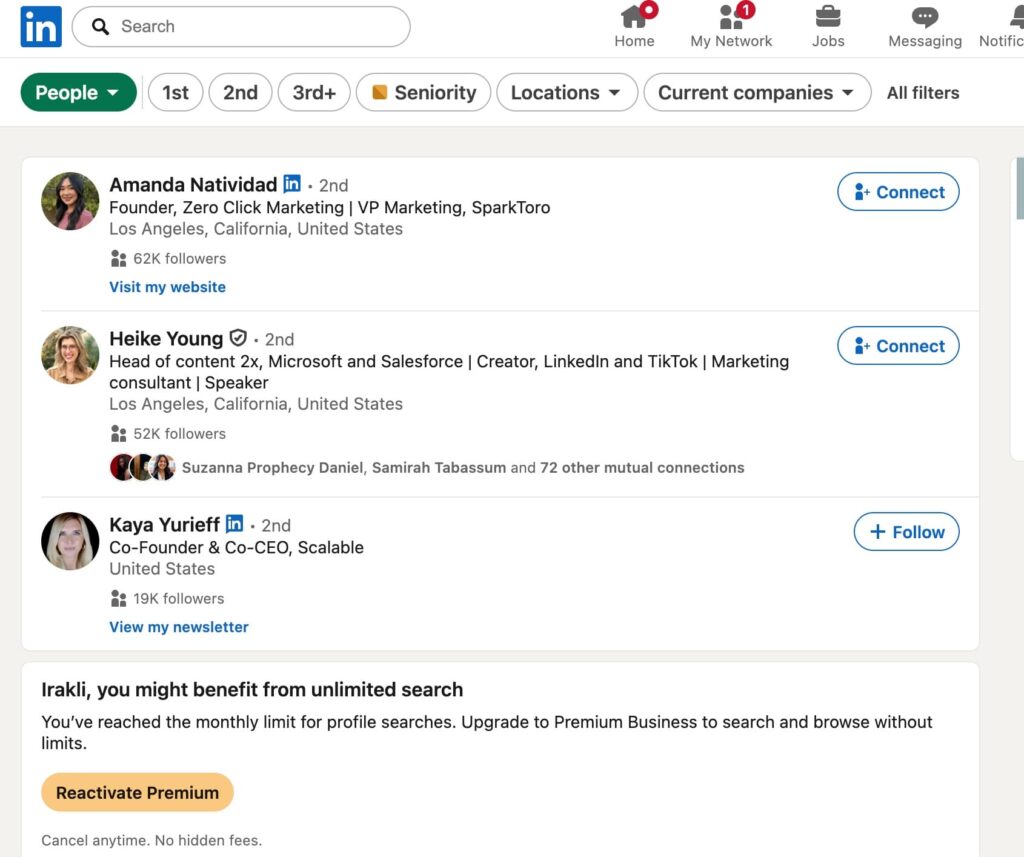
The free LinkedIn search caps your monthly searches and limits your filters. Once you hit the commercial use limit, results degrade fast. For occasional prospecting, that’s fine. But if outbound is a regular part of your workflow, you’ll hit that ceiling quickly.
Sales Navigator removes that ceiling entirely. A Forrester study commissioned by LinkedIn found it pays for itself in under six months. Once outbound becomes a weekly motion, Sales Navigator pays for itself fast.
Setting Up Sales Navigator for prospecting
Three things to sort before you touch a single Sales Navigator filter.
1. Define your Persona first
If you don’t know exactly who you’re targeting (title, seniority, company size, vertical), you’ll end up with a broad list that converts poorly. See our guide on ICP vs buyer persona if you need more info on this.
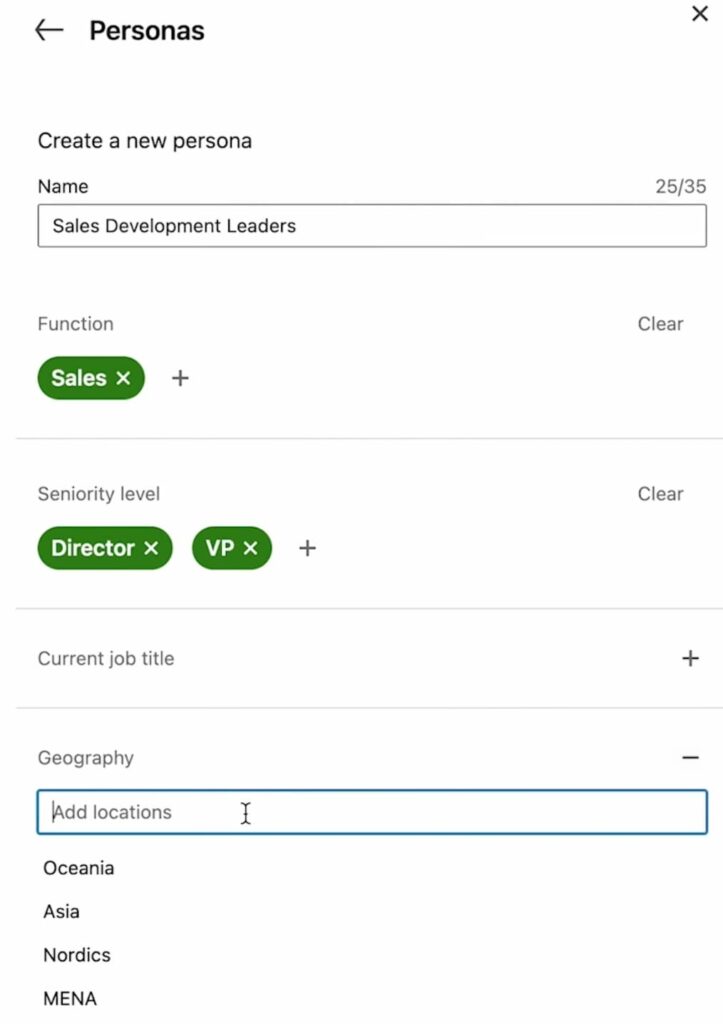
2. Set up a Persona
Go to homepage > Personas > Create new persona.
Encode your ICP criteria: function, seniority, geography, company size. The platform uses this to surface relevant lead recommendations. Skip it and the recommendations are generic.
3. Connect your CRM (Advanced Plus only)
Full integration gives you activity writeback, auto-logging of InMails, lead and contact creation, and data validation.
On Advanced you get basic CRM badges and sync: the deep integration that removes manual work is Advanced Plus only.
Key filters and features for prospecting
Sales Navigator gives you 50+ filters across lead and account search. Not all of them carry equal weight. Here are the ones that matter most for prospecting and outreach.
Advanced lead search
This is where most of your prospecting time goes. You can filter by keyword, title, company, geography, industry, seniority, company headcount, years in current role, and more. The keyword and title fields support Boolean search, which makes them significantly more powerful than they look out of the box.
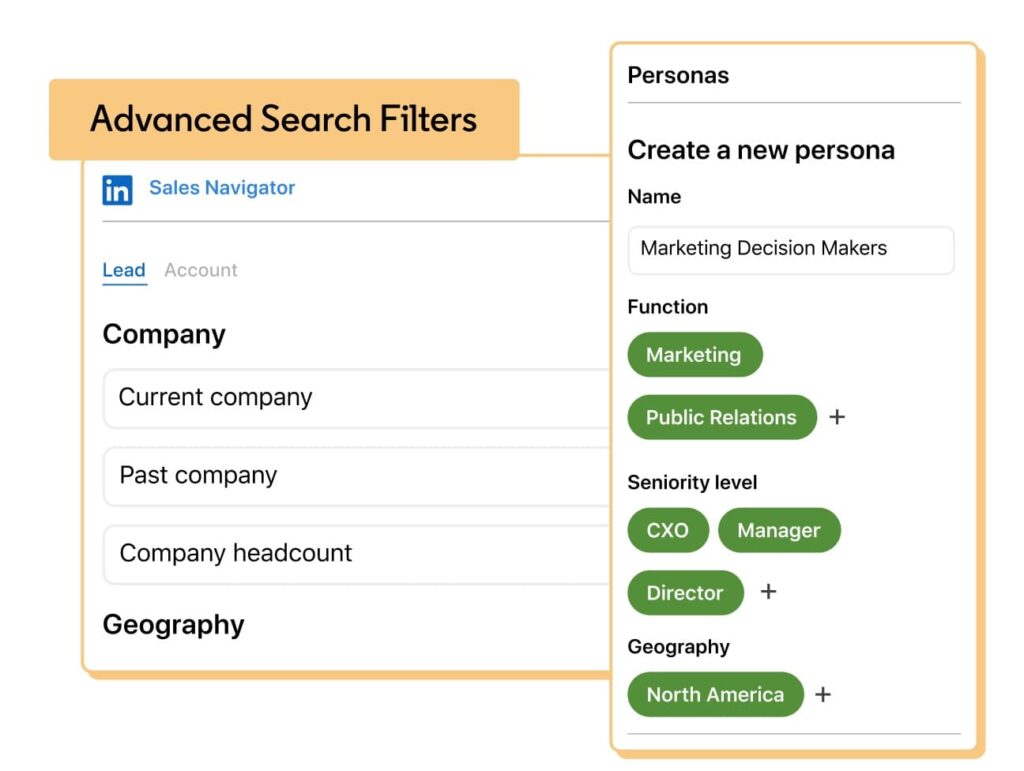
A practical example: if you’re targeting VP-level marketers at SaaS companies with 50-500 employees in North America, you can define all of that in a single saved search and get alerts when new profiles match.
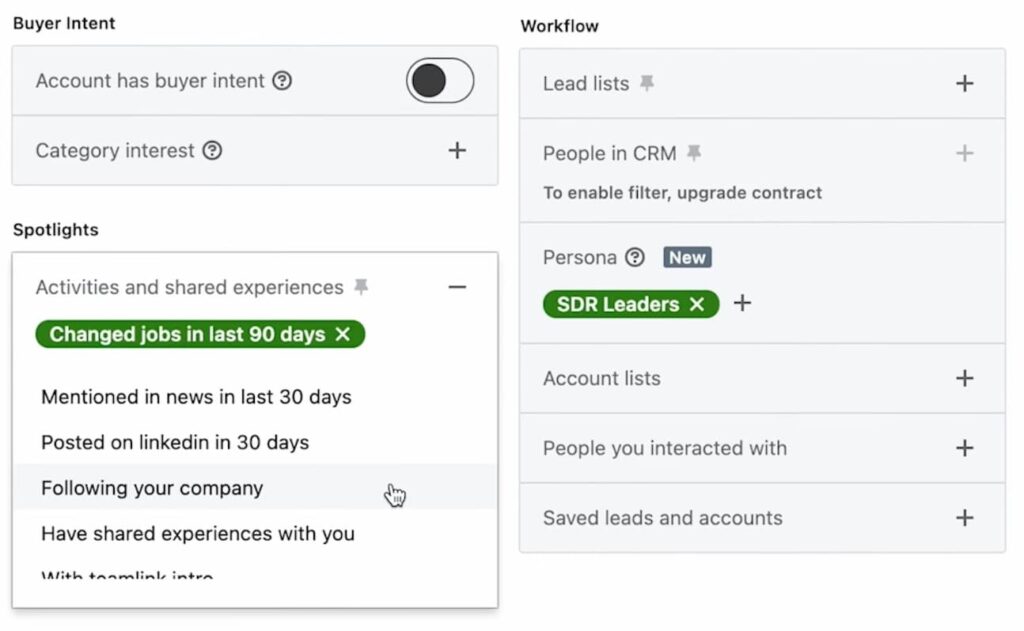
Spotlight filters
This is one of the most underused sections in Sales Navigator. Spotlight filters surface high-intent signals. For example, prospects who have recently changed jobs, followed your company on LinkedIn, posted on LinkedIn recently, or been mentioned in the news.
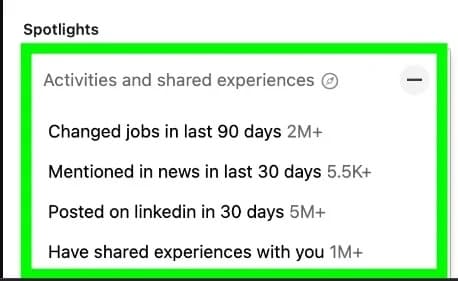
Prospects who recently started new roles are more receptive to vendor outreach.
According to LinkedIn, prospects in your spotlights are 64% more likely to reply to InMail messages too. Your LinkedIn SSI score also reflects how actively you use these signals.
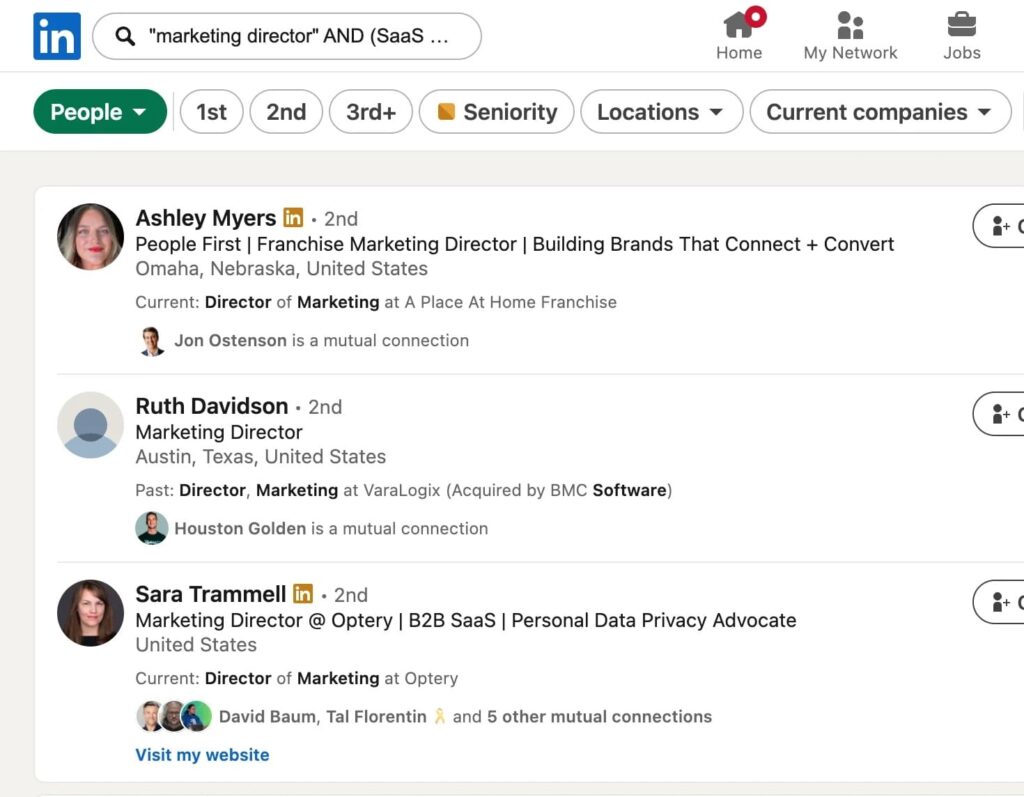
Boolean Search
Boolean search works in the keyword and job title fields. The operators:
- AND – both terms must appear (“sales AND marketing”)
- OR – either term (“VP OR Director”)
- NOT – excludes a term (“manager NOT junior”)
- Quotes – exact phrase match (“head of growth”)
- Parentheses – group logic (“(VP OR Director) AND (sales OR revenue)”)
Use Boolean in the title field specifically when your target has multiple common titles. Searching “VP of Sales” OR “Head of Sales” OR “Chief Revenue Officer” gets you all variants in one search rather than running three separate queries.
Posted on LinkedIn Filter
Found under the Spotlight section, this filter surfaces leads who have posted on LinkedIn in the past 30 days. It’s a reliable activity signal: someone actively posting is far more likely to see and respond to your outreach than someone who logs in once a month.
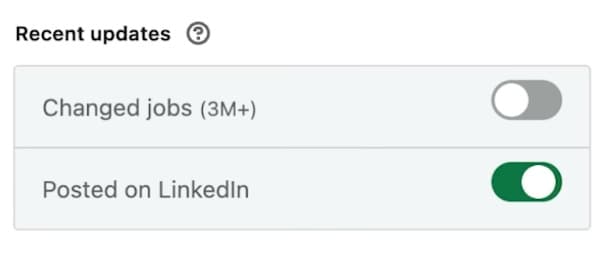
Pair it with your other ICP filters (title, seniority, company size) to build a list of engaged, active prospects who are more likely to see and respond to your outreach.
Job change alerts
Save leads in Sales Navigator and you’ll get notified when they change roles.
This is a high-value trigger for two reasons:
New job = new budget discussions, new vendor evaluations, and a natural reason to reconnect.
Someone who entered your pipeline 18 months ago at a company that wasn’t ready to buy may now be at a company that is and in a more senior role.
InMail Messages
All Sales Navigator plans include 50 monthly LinkedIn InMail credits for direct outreach to prospects outside your network. Credits are returned if the recipient responds within 90 days.
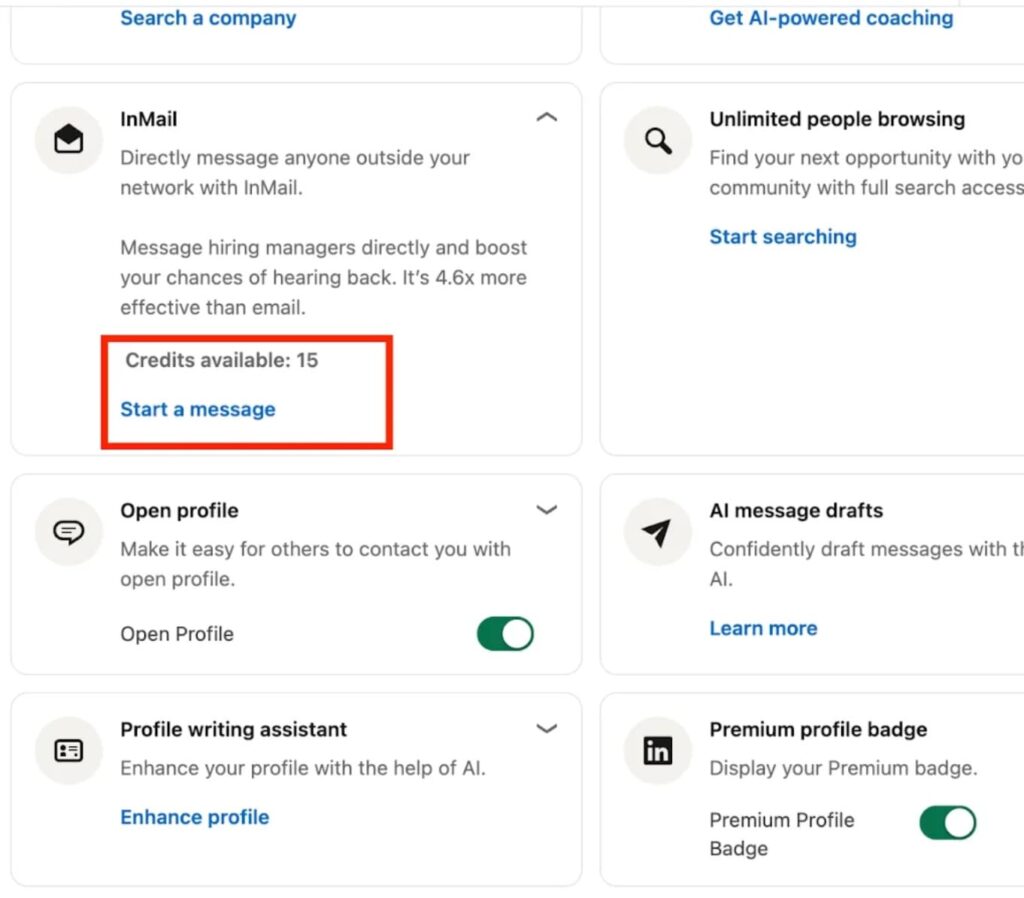
InMail gets more inbox visibility than a standard connection request because it lands directly in the recipient’s primary inbox. Use it for high-priority prospects where a connection request alone isn’t enough. Or for accounts where you want to lead with a specific, personalized message before connecting.
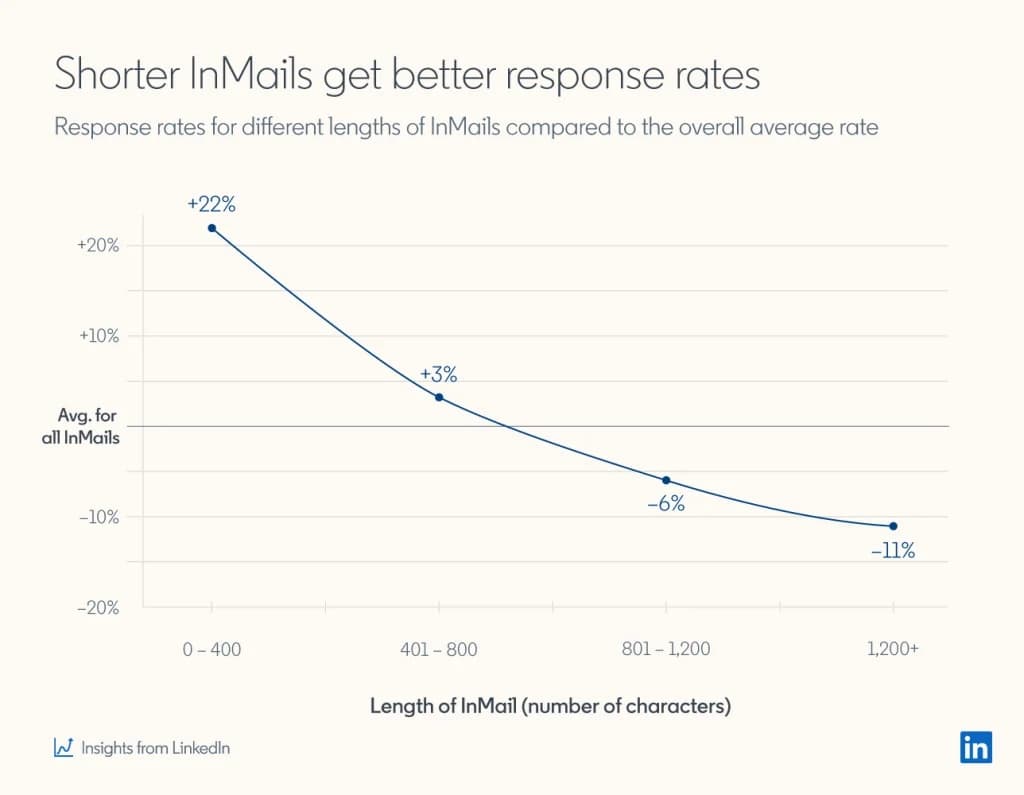
LinkedIn data from Recruiter outreach shows that shorter InMails consistently outperform longer ones. Messages under 400 characters see 22% better performance than average, while those exceeding 1,200 characters fall 11% below it.
Lead IQ and Account IQ (Advanced and Advanced Plus)
Lead IQ gives you AI-driven insights into a prospect’s role, background, and motivations before you reach out. Account IQ provides instant AI summaries of a company’s strategic priorities, so you can prepare account plans in minutes rather than hours.
Both are available on Advanced and Advanced Plus plans only.
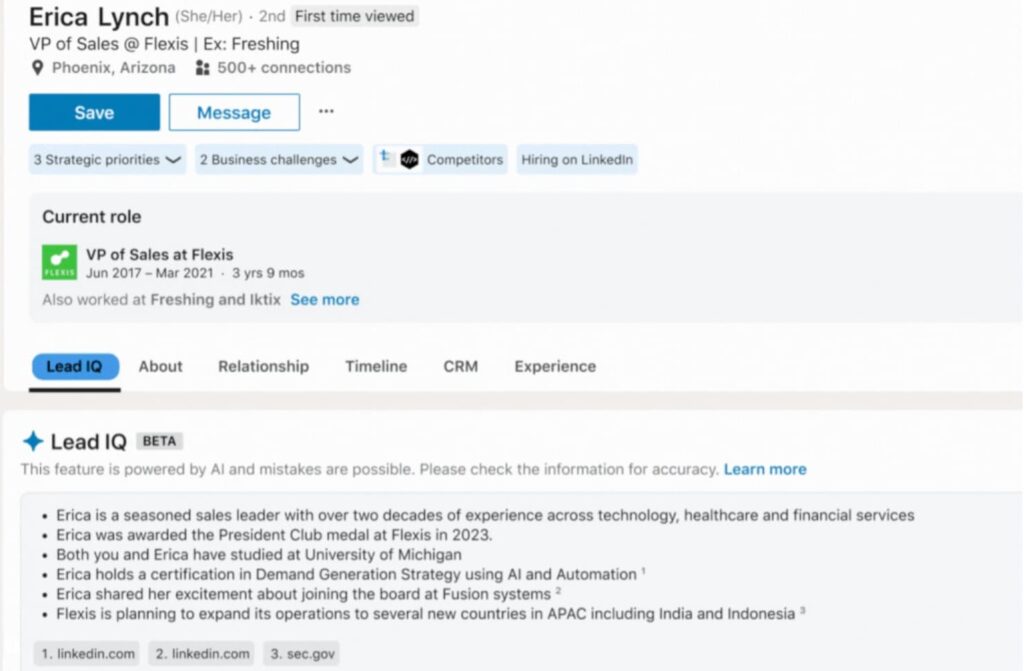
Both features reduce research time significantly. Instead of spending 20 minutes reading a prospect’s LinkedIn activity and their company’s news mentions, you get a structured summary you can act on.
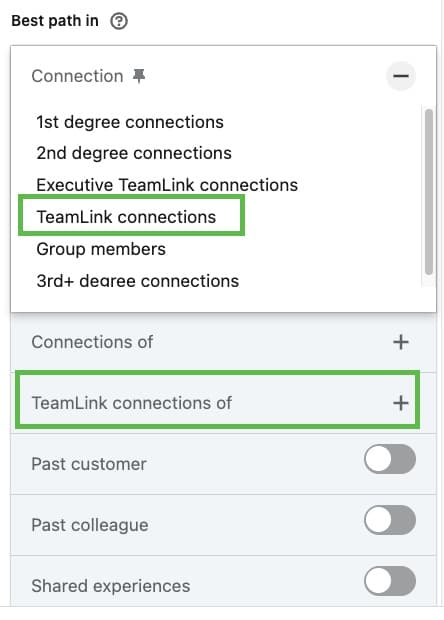
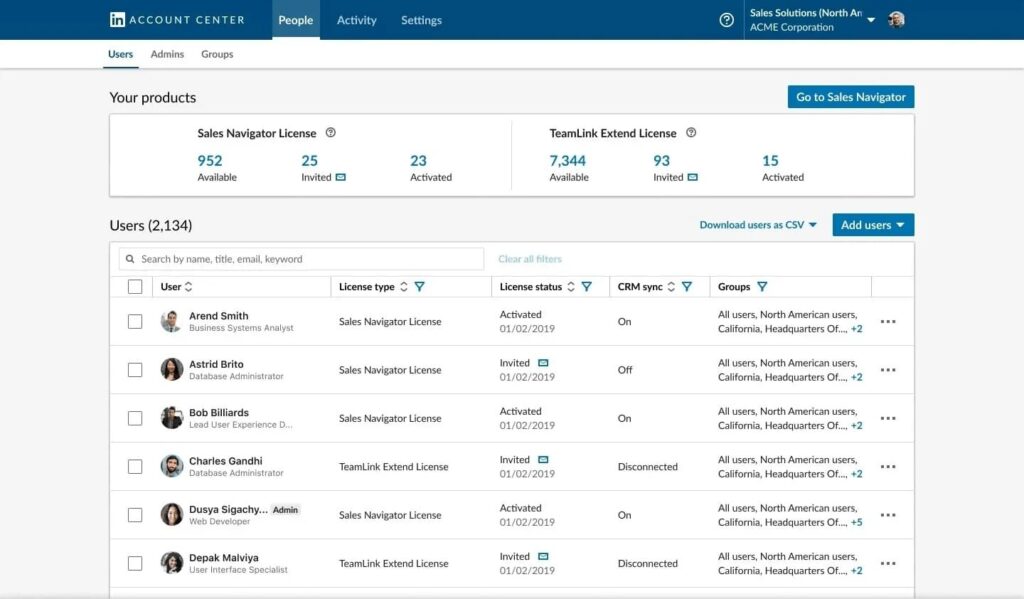
Relationship Explorer and TeamLink
Relationship Explorer is available on all plans (Core, Advanced, Advanced Plus). It surfaces lead recommendations at target accounts, including recent job changes, LinkedIn activity, and warm connection paths. So, you can find the right person to contact and the best way in.
Note: some Spotlights within it (Past Customer, TeamLink) require Advanced or Advanced Plus.
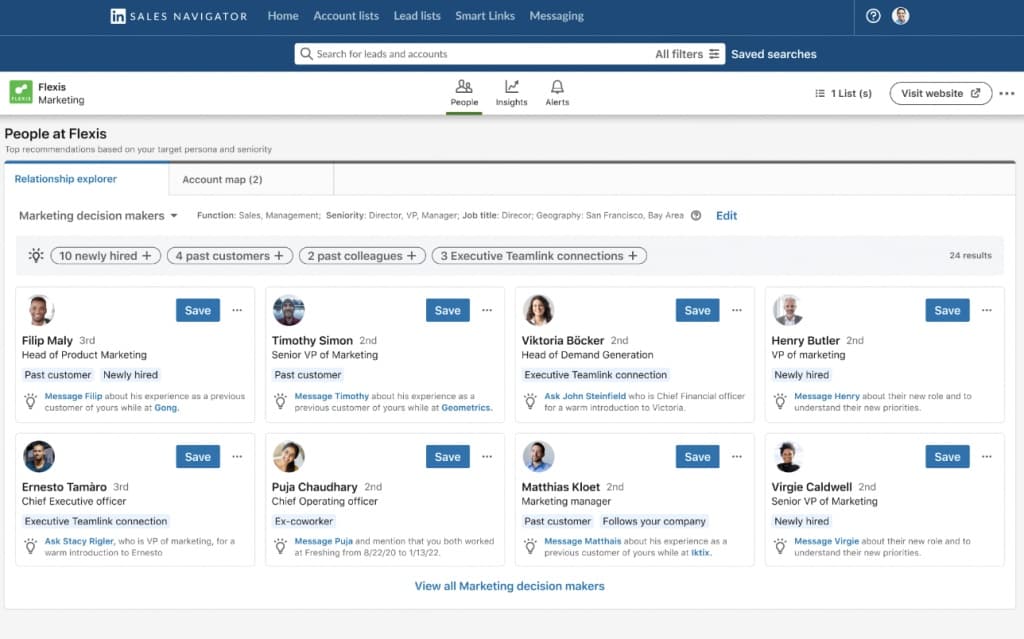
TeamLink, available on Advanced and Advanced Plus, takes this further. It reveals your teammates’ first-degree connections at target accounts, so you can identify warm intro paths and request introductions directly through Sales Navigator rather than going in cold.
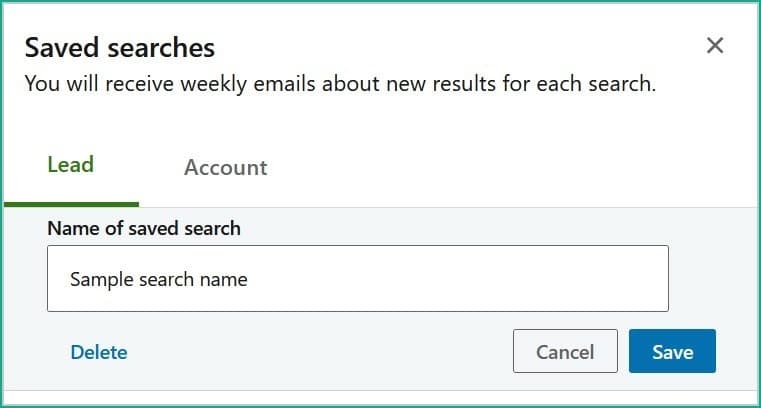
Saved Searches
Any search you build in Sales Navigator can be saved. Once saved, it runs automatically and notifies you when new profiles match your criteria. This is how you build a self-refreshing lead pipeline without manually re-running searches every week.
You can save a total of 50 lead searches and 50 account searches in Sales Navigator, and you will receive weekly alerts for all these saved searches.
For evergreen prospecting campaigns, saved searches paired with Expandi’s auto-reload feature let you run continuously updated outreach without touching the campaign once it’s set up.
See our guide on evergreen campaigns for more info on setting up outreach campaigns that reload leads automatically.
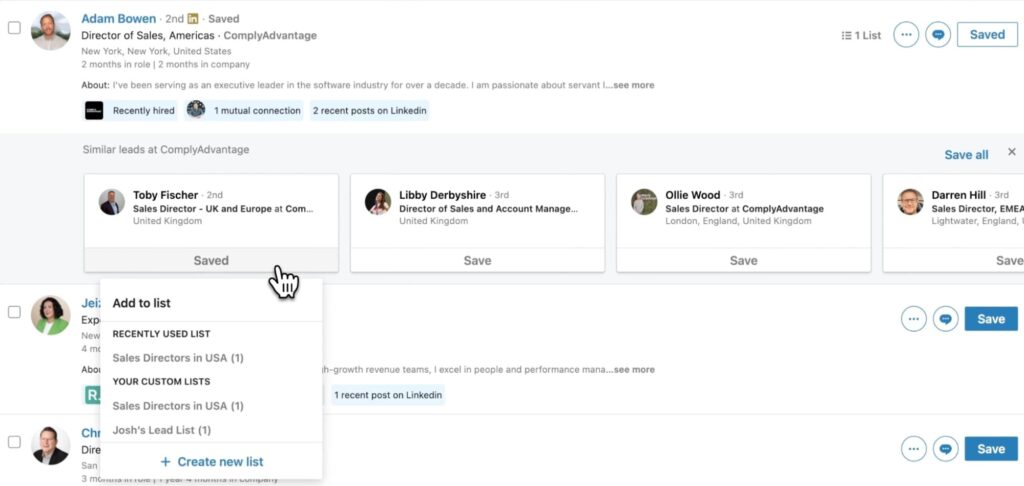
View Similar
Go to any lead’s profile in Sales Navigator and click “View similar.” It returns 100+ lookalike profiles based on that person’s attributes. This is useful when you have a high-performing customer and want to find more prospects who match their profile closely. Same targeting logic, same outreach angle, no extra research needed.
LinkedIn Sales Navigator prospecting tactics
Knowing the Sales Navigator filters is half the job. Most people stop there: they build a decent search, export the URL, and hope the outreach does the rest.
These tactics are about working the list with intent for targeted outreach.
Technology-based targeting
Sales Navigator’s account search includes a “Technologies used” filter. If your product integrates with or competes against a specific tool, this lets you target companies already in that ecosystem.
For example: if you sell a revenue intelligence tool that integrates with Salesforce, filter for companies using Salesforce and then layer in company size and geography. Then use “View employees” on the filtered account list to find decision-makers within those specific companies.
The targeting logic flows directly into your outreach copy as you’re reaching out because you know their stack and you can mention that as part of your personalization.
Connecting with profile visitors
In Sales Navigator, filter for “Viewed your profile” combined with “2nd and 3rd degree connections.” These people know your name, already showed some level of interest, and haven’t connected yet. That’s a warm outreach opportunity most people ignore.
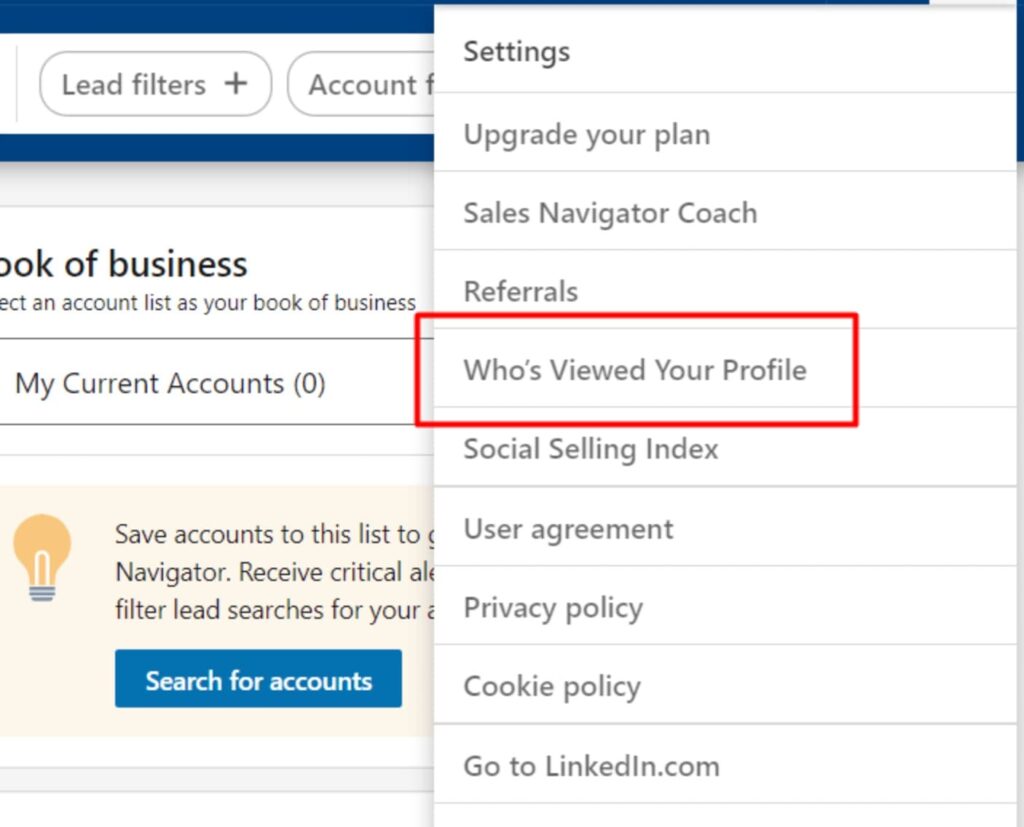
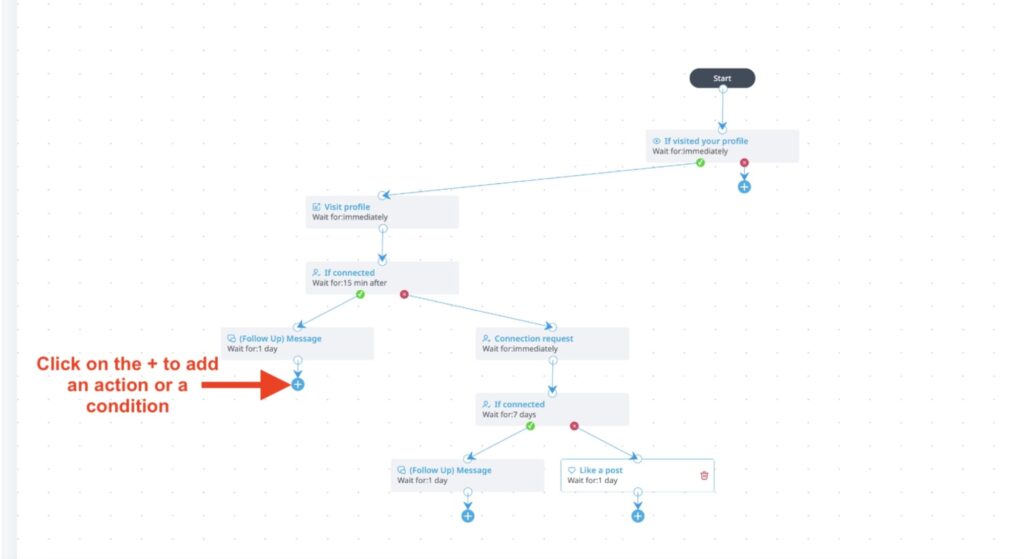
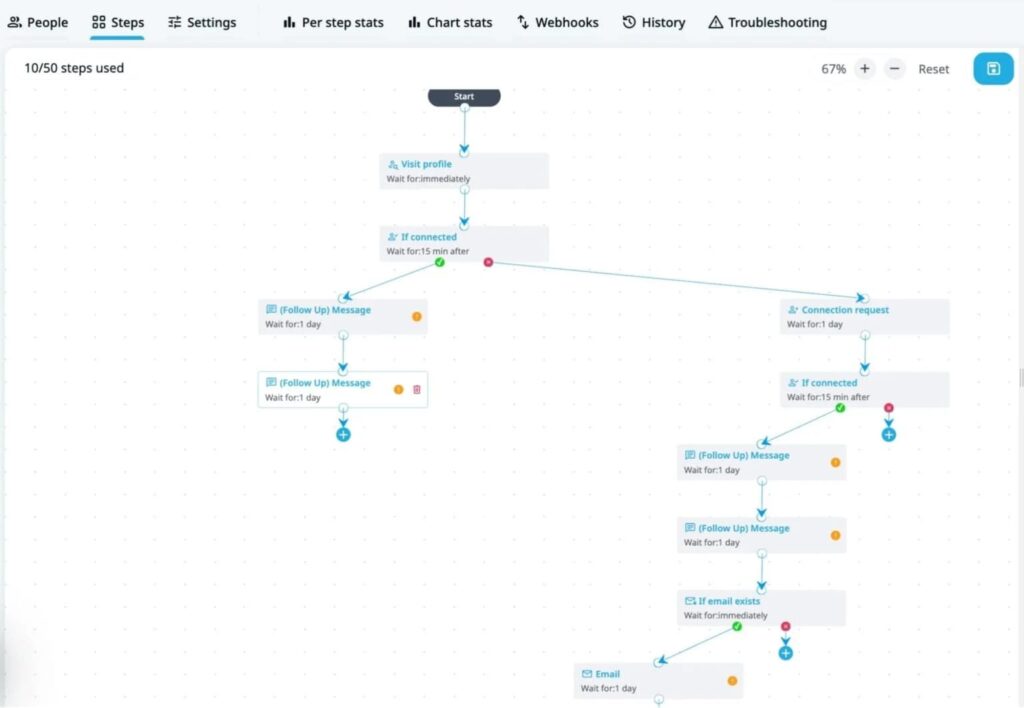
You can take this further: copy the search URL and import it directly into Expandi as a connector campaign.
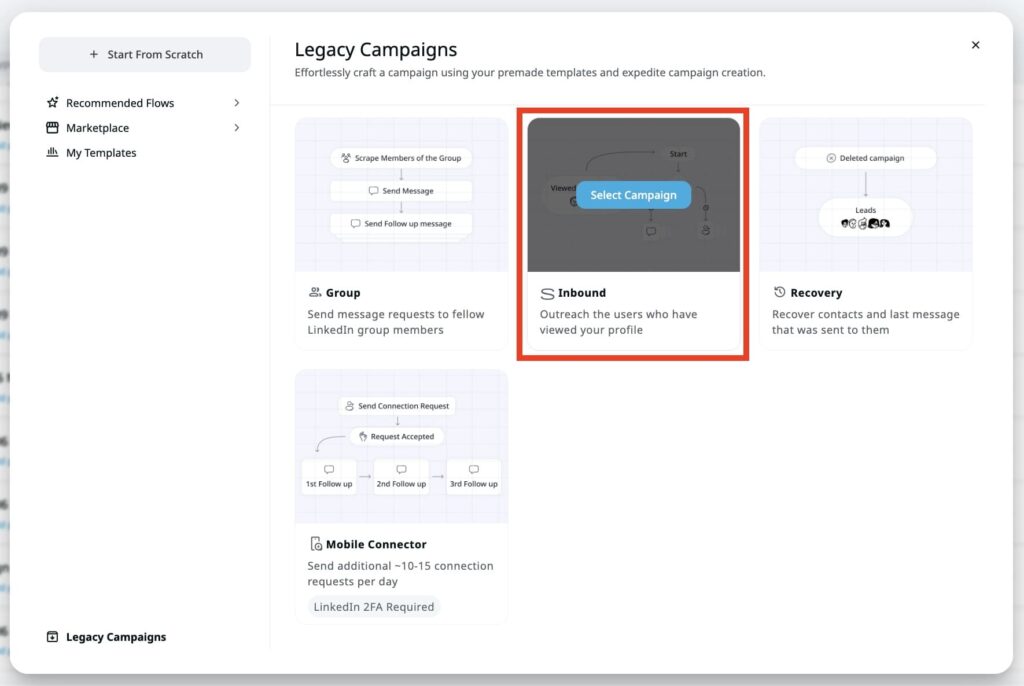
With Expandi, you can then automatically send connection requests to everyone on that list, with a personalized message referencing the profile view. From there, follow-up sequences run automatically after the connection is accepted.
Scraping LinkedIn groups
LinkedIn groups are underused as a prospecting source. Your target audience congregates in specific industry groups, and Sales Navigator lets you filter leads by group membership.
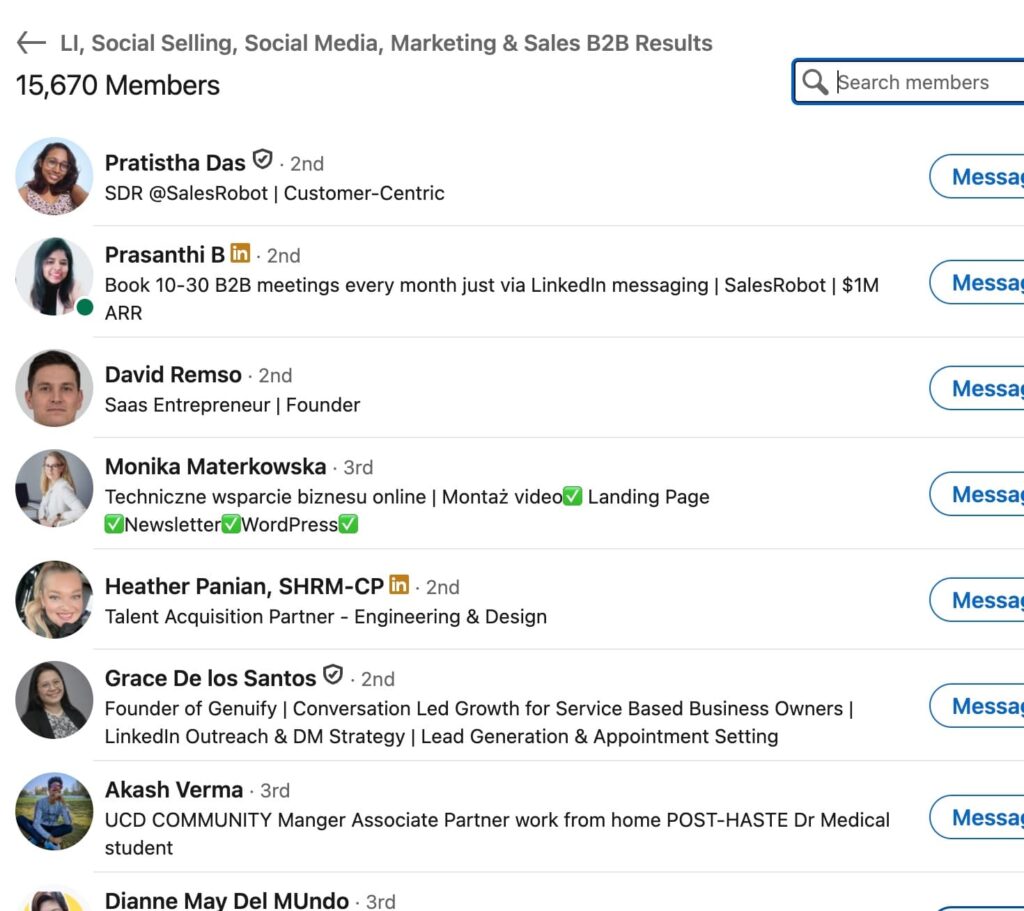
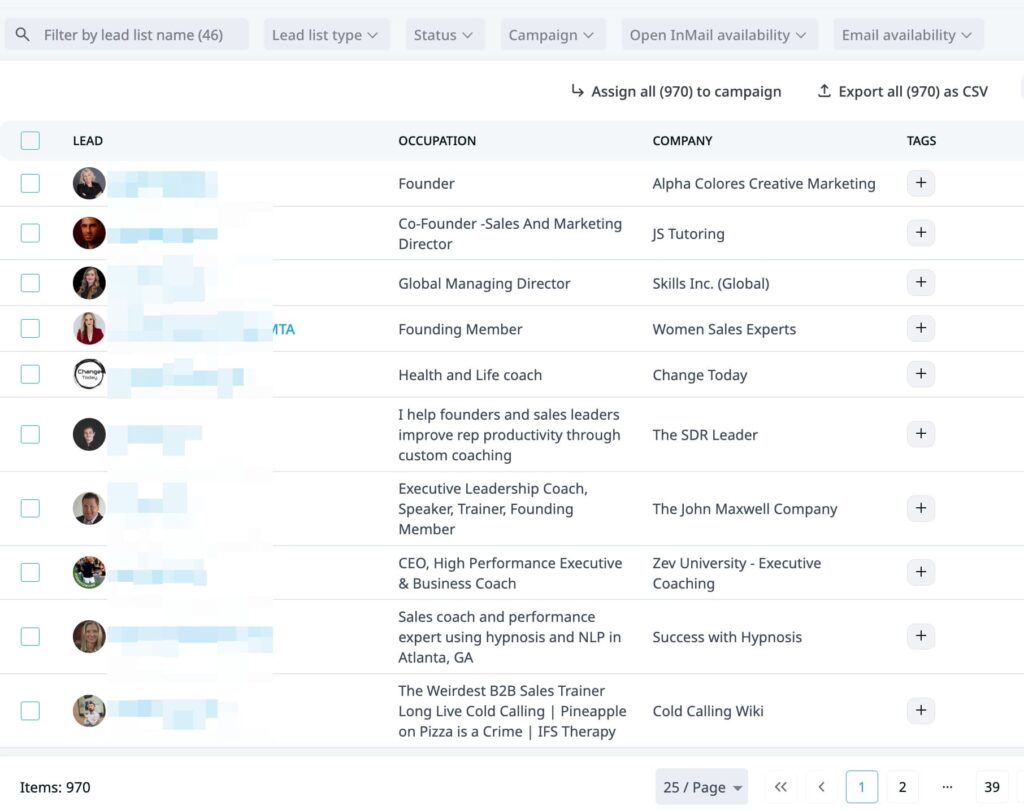
Find a group where your ICP is active, pull the member list using a search filter, and then export the group for outreach through Expandi.
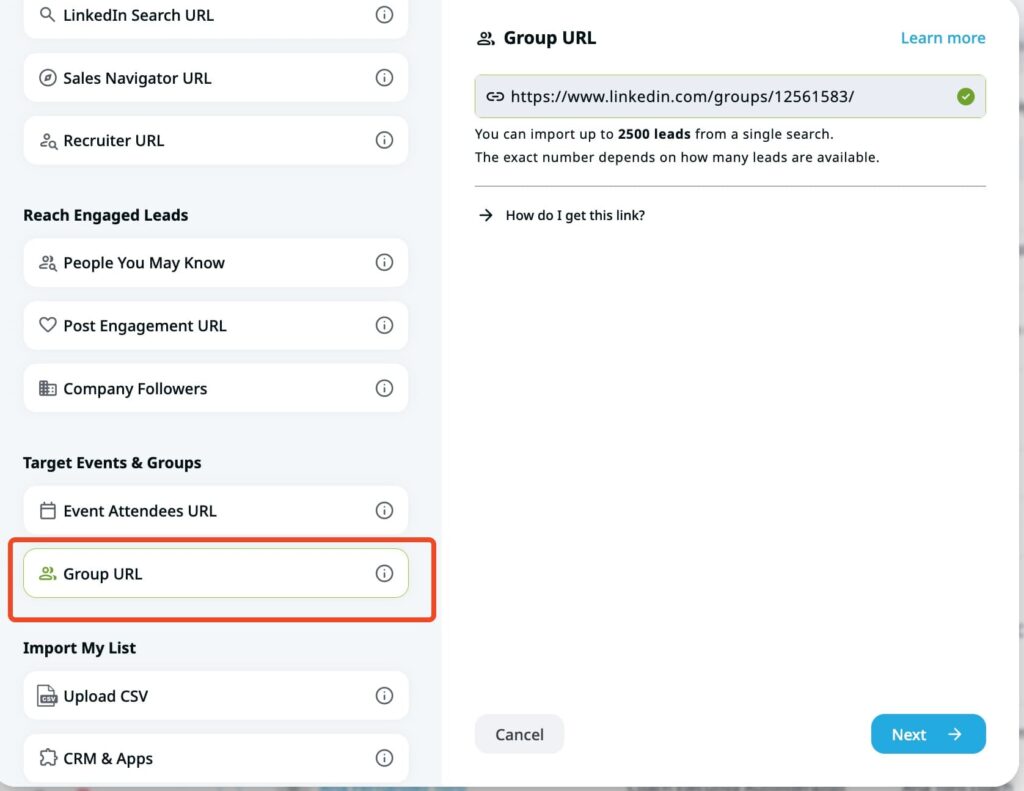
Say you sell a sales automation tool. You find a LinkedIn group called “B2B Sales Professionals” with 15,000 members. Filter that group in Sales Navigator by company size (50-500 employees) and title using Boolean (“Director” OR “VP” OR “Head of”), import the URL into Expandi, and you have a targeted list of decision-makers already engaged in your space.
The connection message angle is simple: you’re both in the same group. That shared context alone improves acceptance rates versus a cold connection from nowhere.
“Hi {first_name}, saw we’re both in the B2B Sales Professionals group – would love to connect with someone working in the same space.”
Outreach to active posters
Filter your lead search with the “Posted on LinkedIn” Spotlight filter combined with your standard ICP criteria. This gives you a list of prospects who are actively on the platform and engaged – the highest-intent pool you can reach outside of direct buyer signals.
Before sending a connection request, spend 30 seconds on their profile and check what they’ve been posting about. Then reference it directly:
“Hi {first_name}, came across your post on [topic] – it’s something we think about a lot at [your company]. Would love to connect and swap notes.”
For a full breakdown of how to turn LinkedIn signals into triggered outreach sequences, see our guide on signal-based outreach.
Boolean search + automated outreach
Build a precise Boolean search in Sales Navigator using the title and keyword fields to zero in on your exact ICP. Once you’re happy with the results, copy the search URL and paste it into Expandi.
Paste the URL into Expandi as a campaign source. Expandi will scrape the full lead list automatically.
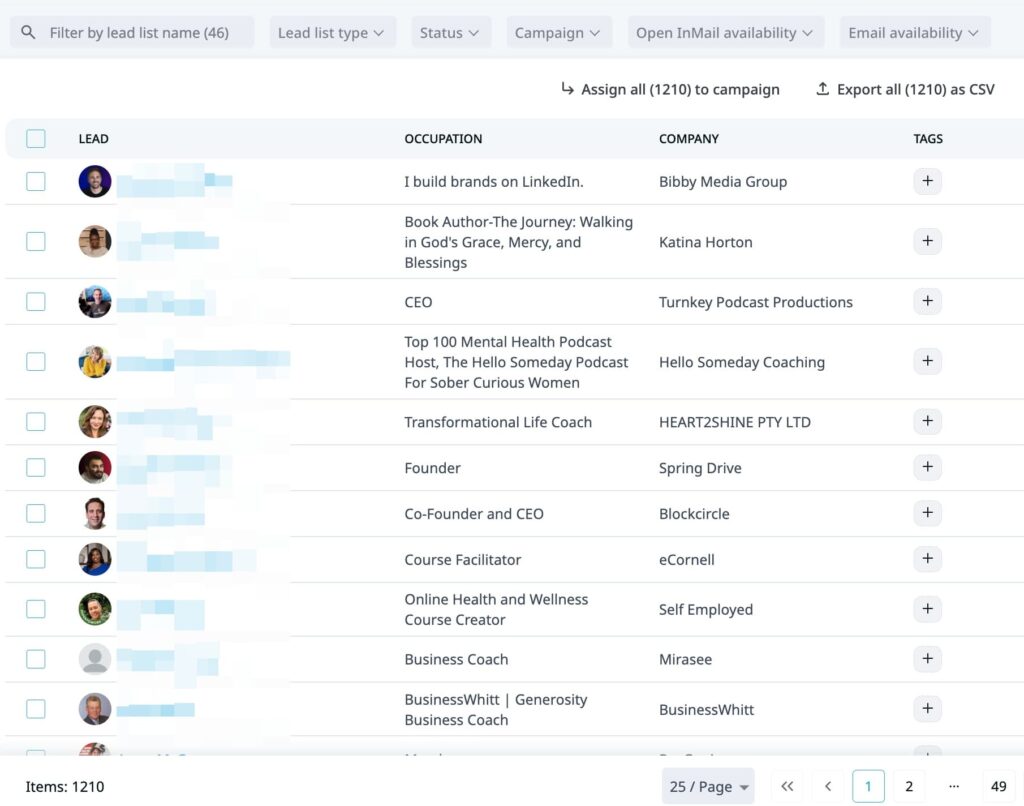
From there, Expandi handles the full outreach workflow: sending connection requests, running follow-up message sequences, and if needed, coordinating email outreach alongside LinkedIn, all from one dashboard.
For the email side of that equation, see our cold email outreach best practices for 2026.
Using LinkedIn Sales Navigator in 2026: FAQ
LinkedIn Sales Navigator Core starts at $119.99/month billed monthly, or $89.99/month on an annual plan ($1,079.88/year).
Advanced starts at $159.99/month billed monthly, or $149.99/month on an annual plan ($1,799.88/year).
Advanced Plus pricing is custom and requires contacting LinkedIn directly. All plans come with a free trial for eligible accounts.
Core is built for individual sellers and covers advanced search filters, saved searches, InMail credits, and lead/account lists.
Advanced adds team features like TeamLink, Account IQ, Lead IQ, and Buyer Intent signals.
Advanced Plus layers in deep CRM integrations with Salesforce and Microsoft Dynamics, embedded experiences, and enterprise-grade data validation. Most individual sellers and small teams will find Core or Advanced sufficient.
For B2B sellers who rely on LinkedIn as a primary prospecting channel, yes. The advanced filters, intent signals, and saved search alerts alone significantly cut manual prospecting time.
The ROI depends on how systematically you use it: pairing it with an outreach tool like Expandi to automate follow-ups is where many sales teams get the best return.
Start with Lead Filters to define your ICP: title, seniority, company size, industry, and geography. Layer in Spotlight filters like “Posted on LinkedIn” or “Changed jobs in last 90 days” to prioritize active, high-intent prospects. Save your search to get weekly alerts when new profiles match.
From there, export the search URL into Expandi to automate connection requests and follow-up sequences at scale.
Start prospecting smarter with Sales Navigator
Sales Navigator gives you the targeting precision that free LinkedIn search can’t come close to. But the tool is only as good as how you use it.
The biggest lever most people leave untouched is the combination of saved searches + Spotlight filters + intent-based outreach. That trio alone builds a pipeline that refreshes itself and surfaces the right prospects at the right time.
Where most teams stall is at execution though. Sales Navigator helps create a list of targeted leads. You still need a system that sends the outreach, runs the follow-ups, and keeps the campaign alive without constant manual input.
That’s where Expandi closes the gap. Import your Sales Navigator URL, attach a sequence, and your outreach runs automatically, at the volume and consistency that moves pipeline.
See what your Sales Navigator list looks like inside an Expandi campaign — start free for 7 days.


You’ve made it all the way down here, take the final step